• Nav Social Menu

    • Facebook
    • Instagram
    • Pinterest
    • Twitter
    • YouTube

I Restore Stuff

  • Home
  • Shop
    • New Arrivals
    • Special Deals
    • Artisan Paint Products
      • Artisan Mineral Paint *NEW*
      • Artisan Chalk Finish
      • Artisan Waxes, Oils & Sealers
      • Artisan Specialty Finishes
      • Artisan Brushes
    • Fusion Mineral Paint
      • New Arrivals
      • Fusion Paint
      • Choosing Fusion Colours – Difference Between Whites, Greys, Neutrals
      • Prep
      • Metallic Paints
      • Textured Finishes
      • Transfer Gel
      • SFO – Stain & Finishing Oil
      • Waxes & Finishes
    • Miss Mustard Seed’s Milk Paint
      • Milk Paint
      • Bonding Agent
      • Accessories
      • Waxes, Oils, Finishes
    • Brushes / Rollers
      • Two Fussy Blokes Rollers
      • Cling On! Brushes
        • Cling On Brushes – Pointy
        • Cling On Brushes – Short Handle
        • Cling On Brushes – Round
        • Cling On Brushes – Oval
        • Cling On Brushes – Flat
        • Cling On Brushes – Bent
      • Brushkeeper Eco Brushes
      • Wax Brushes
      • Artisan Brushes
      • Brush Soaps / Cleaners
    • Sandi Hands Sanding Gloves
    • Antique Australian Canning Labels
      • Printed Canning Labels
      • Digital Downloads
    • Wreaths & Accessories
    • Stencils by Essential Stencil
    • Sharon’s Amazon Storefront
  • Creative Business Help
    • Workshops/Mentoring
    • My Favourite Tools
    • 10 Video Content Ideas for Social Media
    • Creative Business Posts
  • Painting? Start Here
    • Learning to Paint? Start Here!
    • Video Tutorials
    • Tutorials
  • Location/Contact Me
    • About
    • Media
    • Advertise
  • My Cart
  • Login

Huge Wardrobe Makeover in MMS Milk Paint colour, Mora

Antique Finds· Furniture Makeovers· Miss Mustard Seed's Milk Paint Products

21 Jan

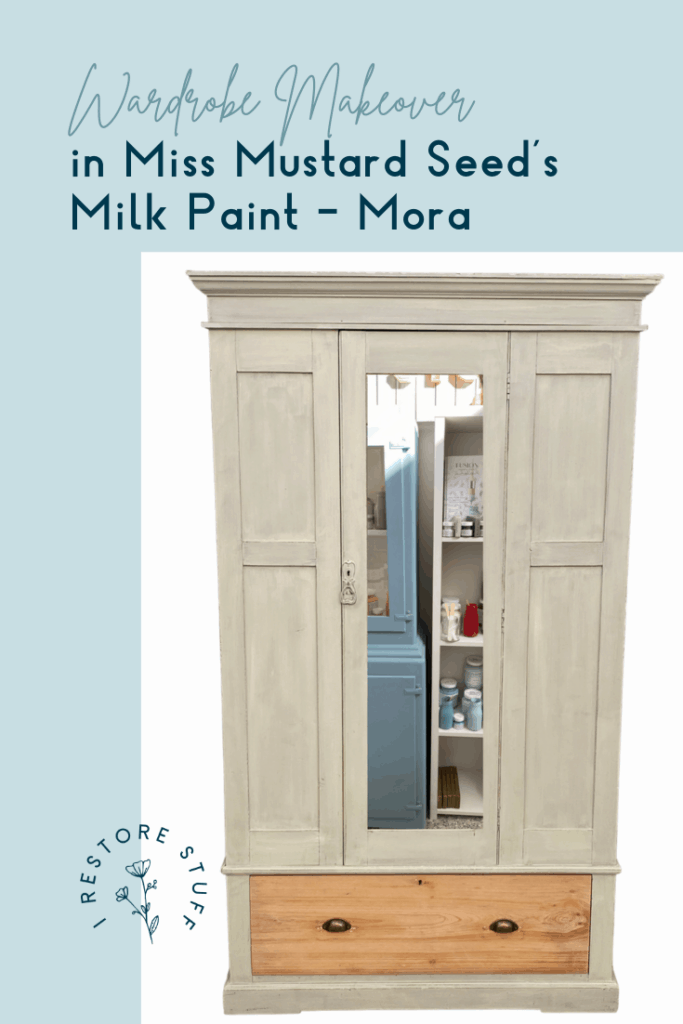
This wardrobe makeover that I thought was going to be straight forward, started off with a little challenge. I’ve had this piece for some time and knew that I wanted to paint it in Miss Mustard Seed’s Milk Paint, so chose the colour Mora, but first it needed a little work.

Pinterest image for Wardrobe Makeover in MMSMP Mora
Save this image to your Pinterest boards!

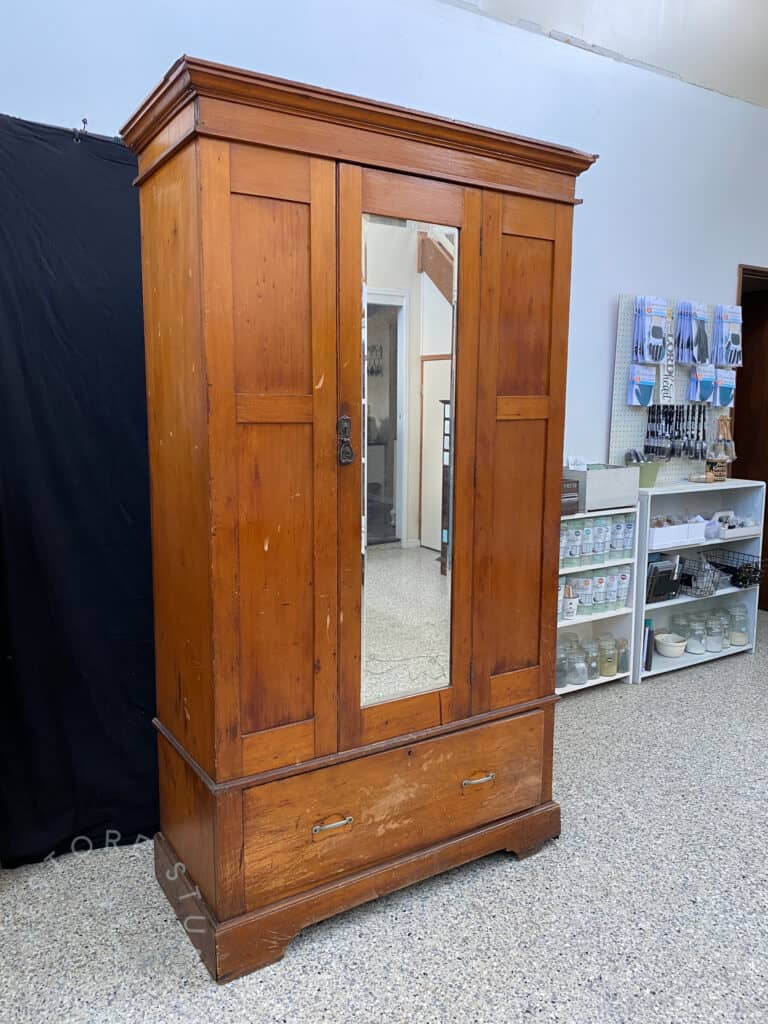
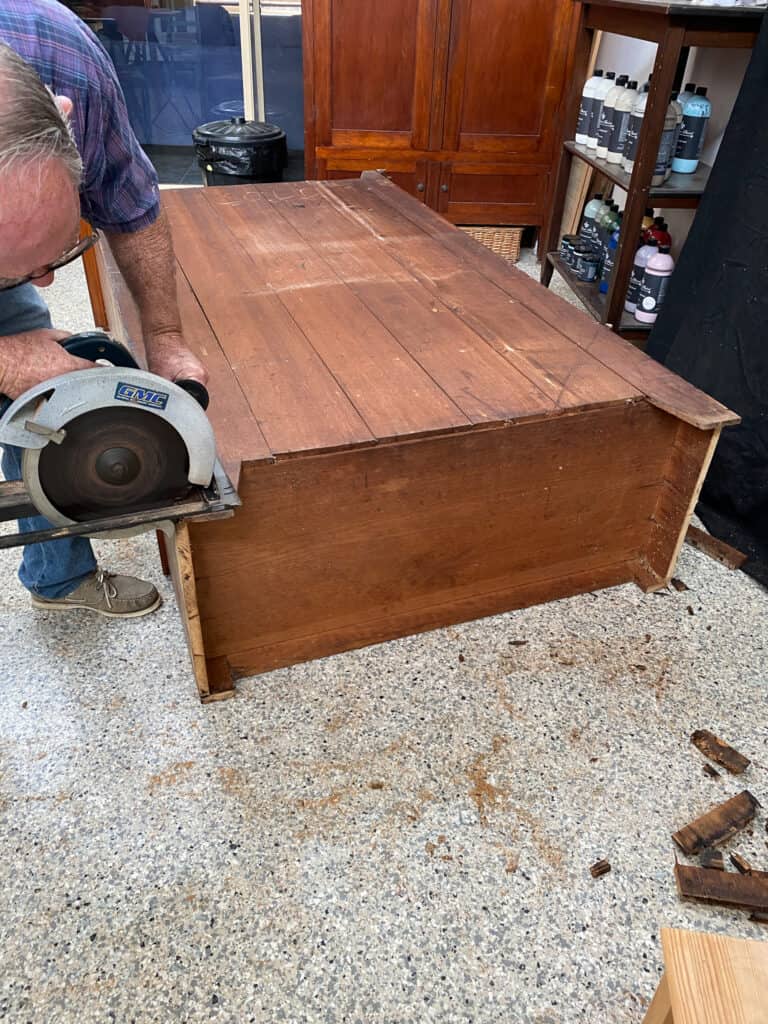
The whole base was water damaged and had rotted, so we lay this big guy down and assessed the damage. We removed the front panel of the base skirting and decided to trim off the damaged portion.

After marking it and measuring to make sure it was all even, my father-in-law helped cut the base off with a circular saw.

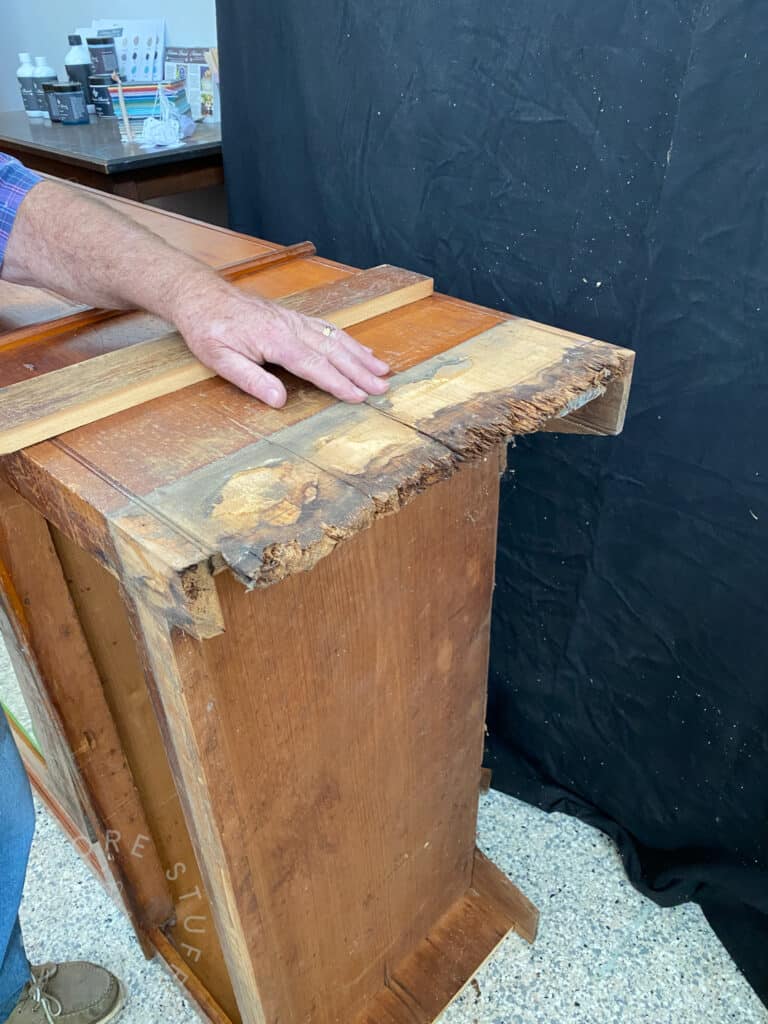
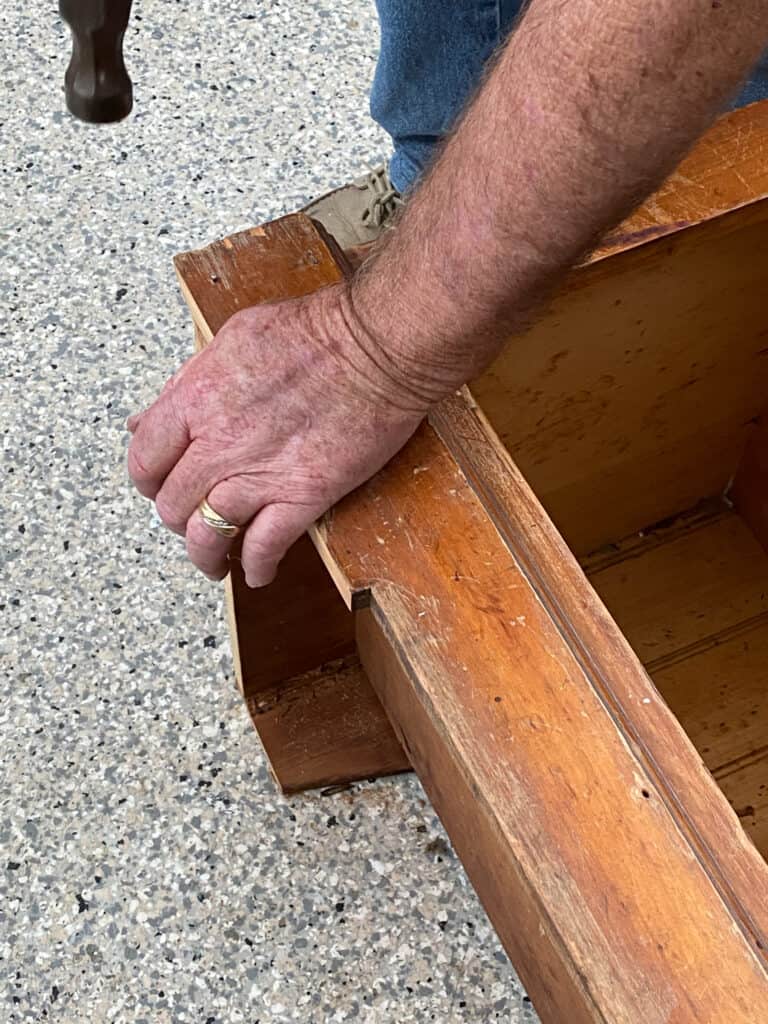
Now we could add that front trim back on, which we also cut the base off to match and line it up exactly where we pulled it off from originally. Here’s dad nailing it back in place.

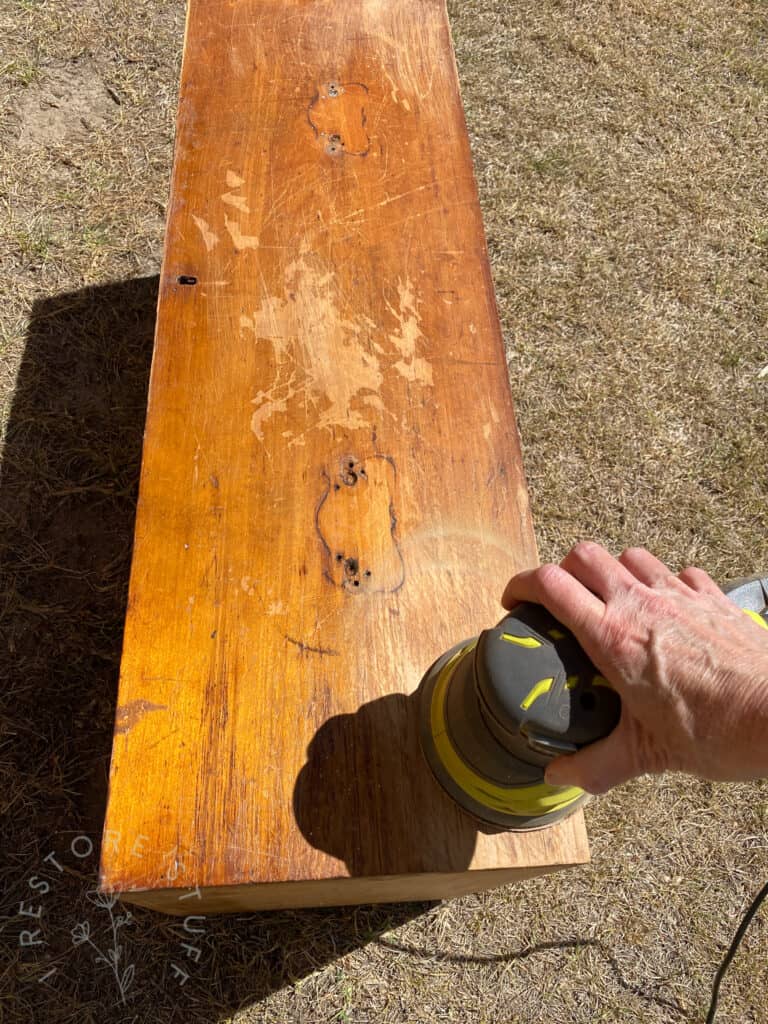
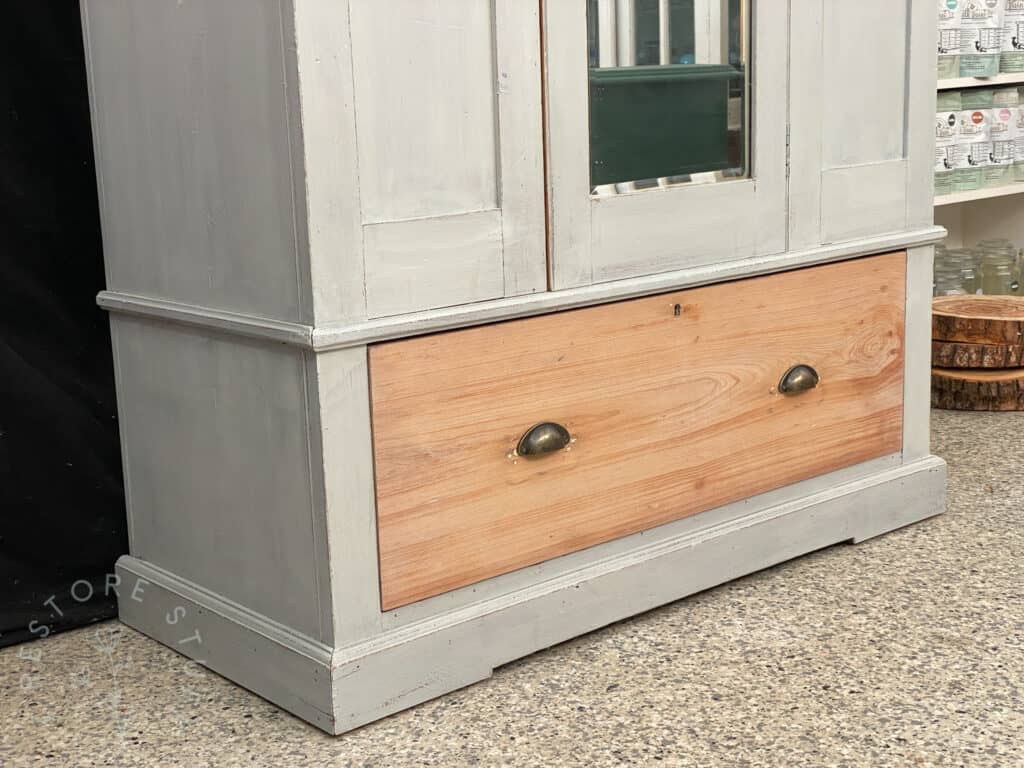
I like the look of having some bare wood on some pieces, whether it be the top of a dresser or the drawers of a piece. So I sanded back the big bottom drawer to reveal some lovely timber underneath. I’ll show you the lovely wood further down this post.

Not sure what kind of sander to use for which DIY projects? I have a great post here: How to Choose the Best Sander for your Furniture Project

Starting to paint – one coat of MMSMP Mora on the side.

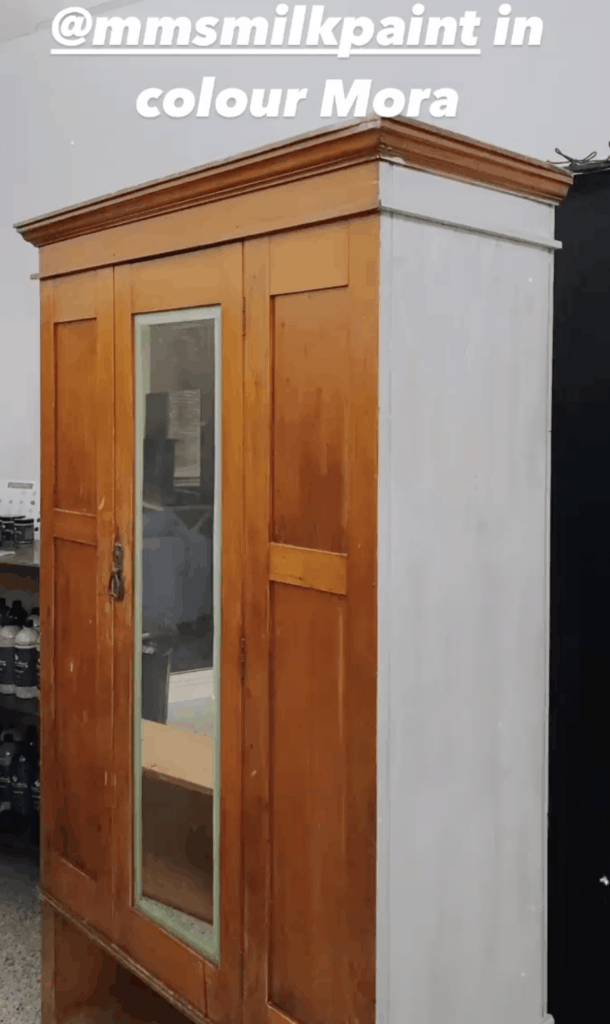
I had to screen shot some of my Instagram stories (above and below) because I forgot to take progress pics during the painting process. But you can always use the search bar at the top of my website to see so many other projects using Miss Mustard Seed’s Milk Paint where I show you mixing, painting, etc. Here’s one of my Youtube videos for example.

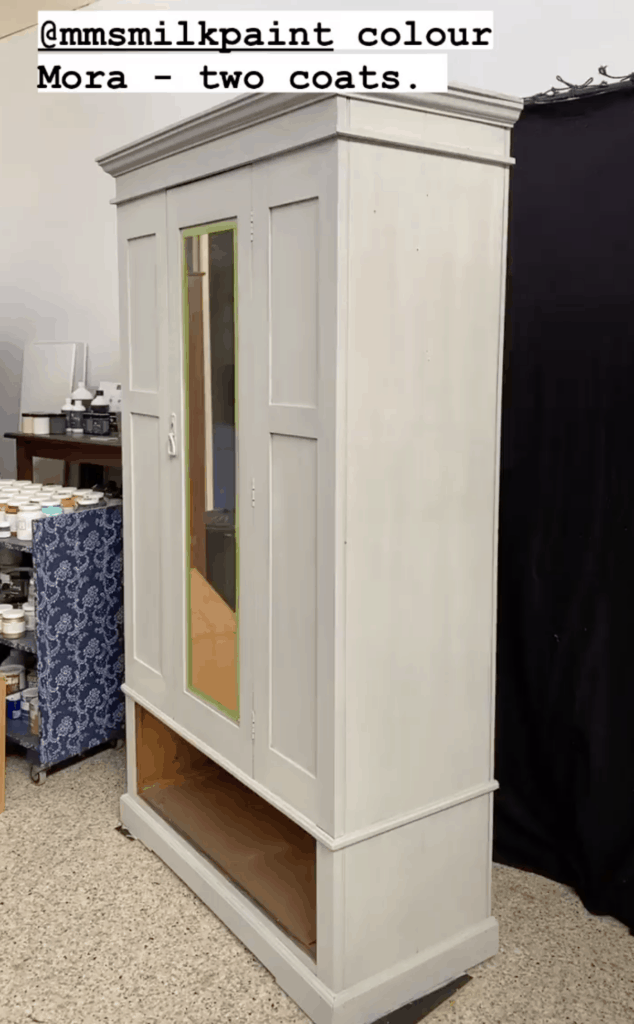
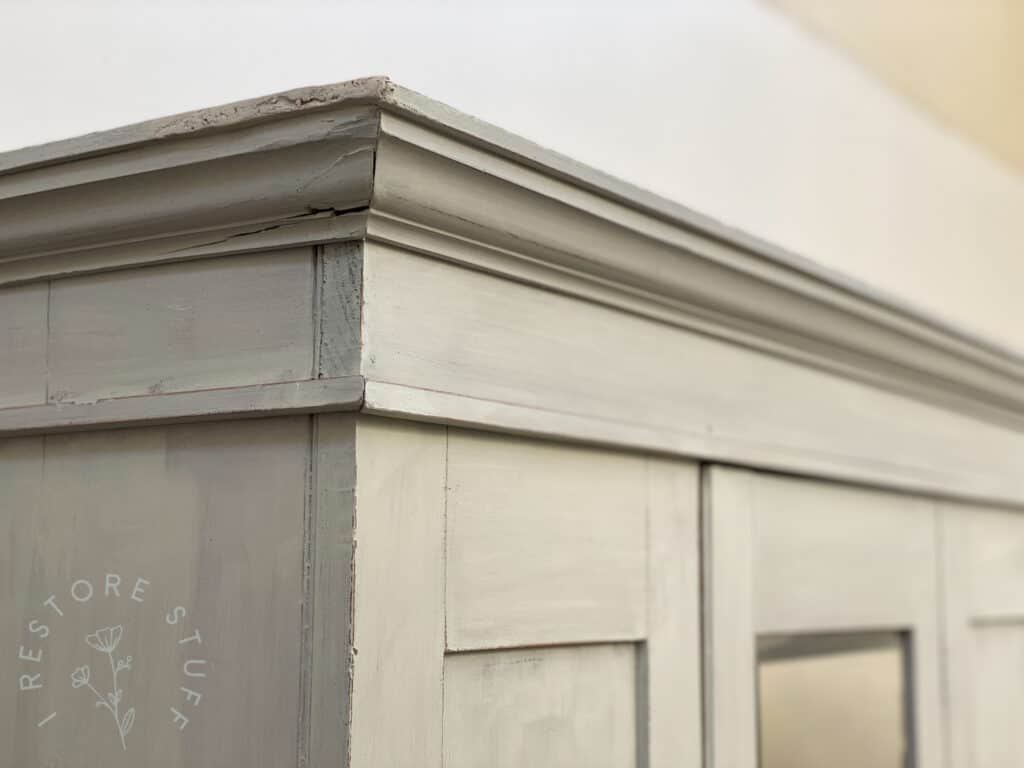
Above is the first coat of milk paint going on. Below, two coats of Mora in Miss Mustard Seed’s Milk Paint. (USA readers can find Milk Paint here)

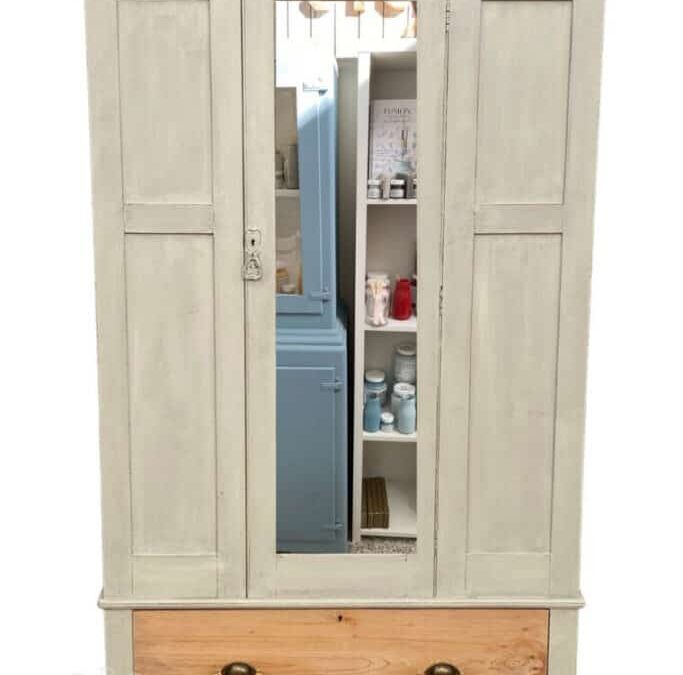
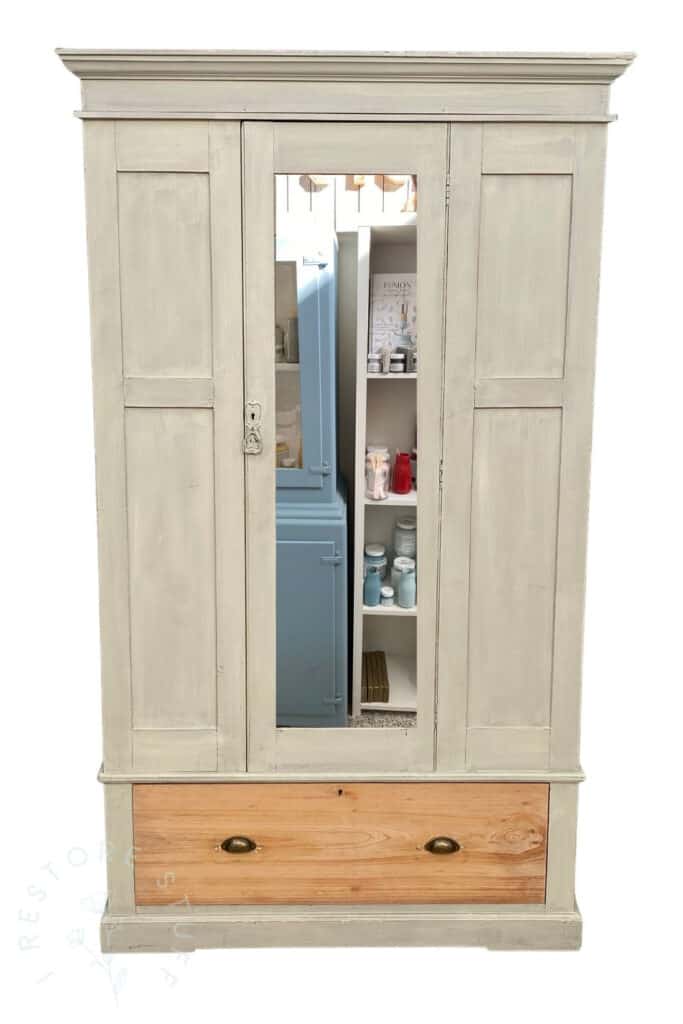
Here’s the big drawer which I applied white wax to, to give it a lighter wash look. Then added the cup pull handles on. I love the little dings and crevices that hold the white wax.

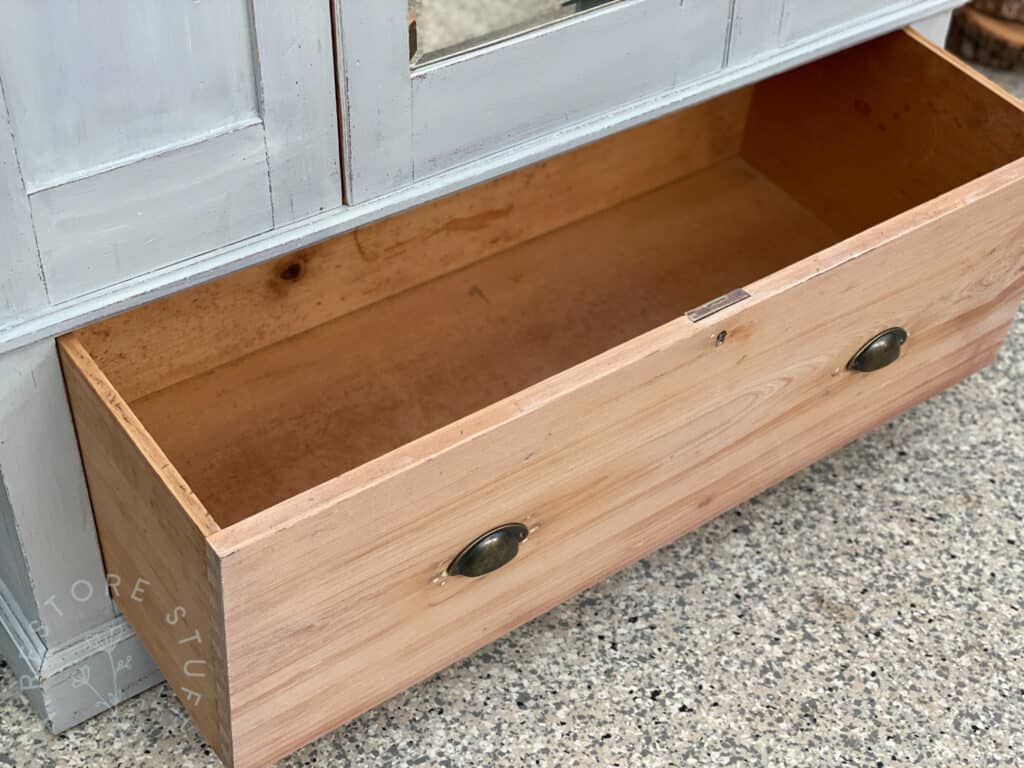
I’ve opened the drawer below so you can see the slight difference between the white waxed front, and the inside/sides of the drawer which are the original wood colour.

open drawer of large wardrobe

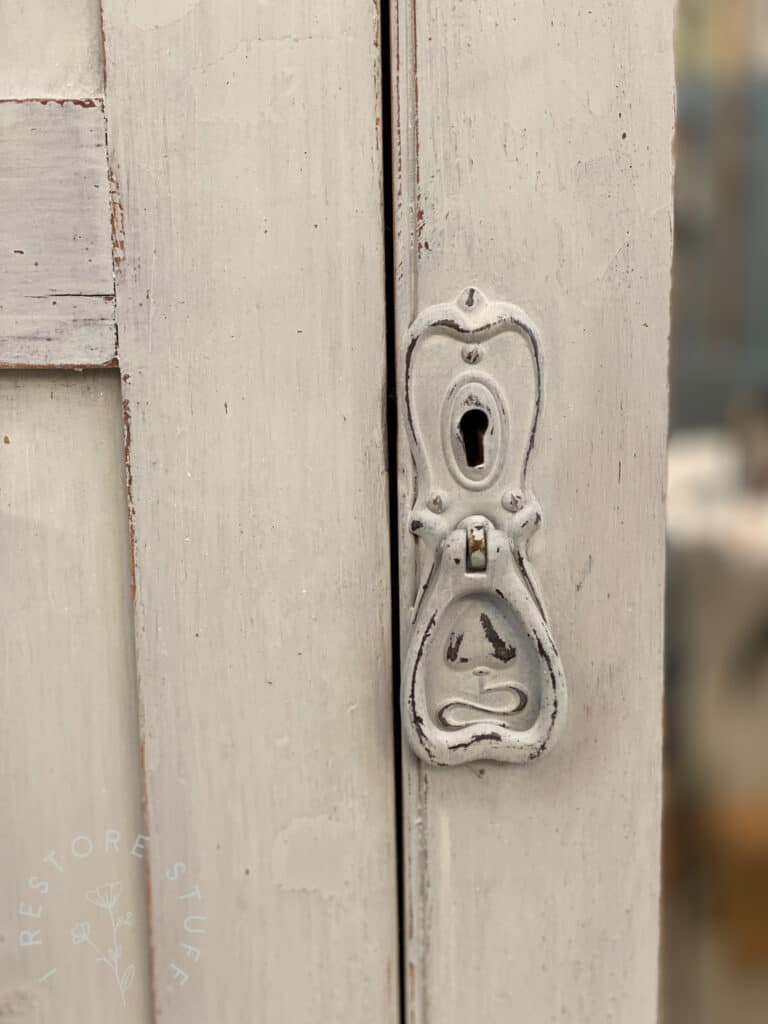
I added white wax to the entire piece, too. I love the white-wash look and feel it gives to the Mora coloured milk paint.

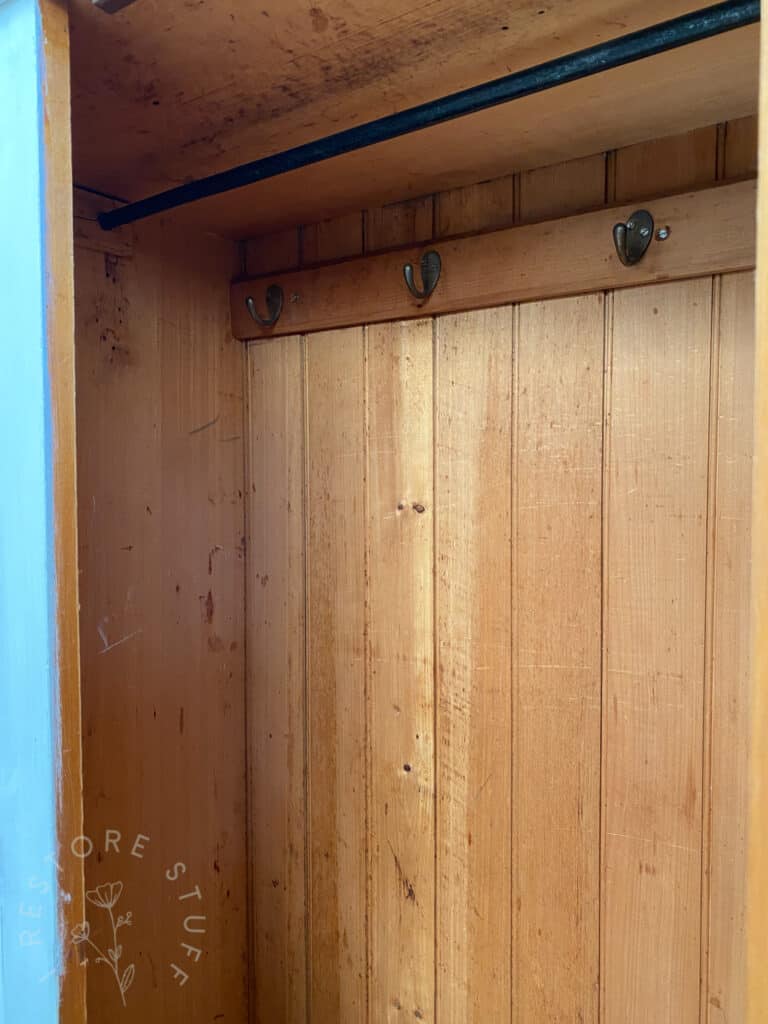
I left the inside of the wardrobe unpainted. I love the old wood look inside.

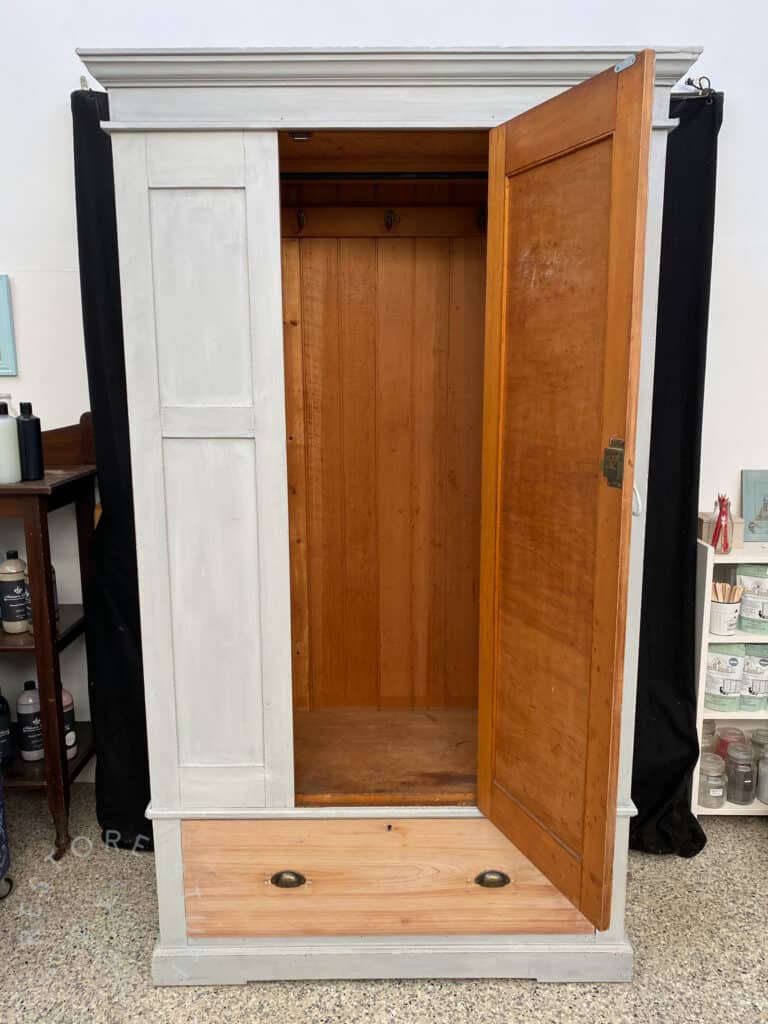
I would even be nice with a bit of Hemp Oil added to the wood surface, so I might still do that yet.

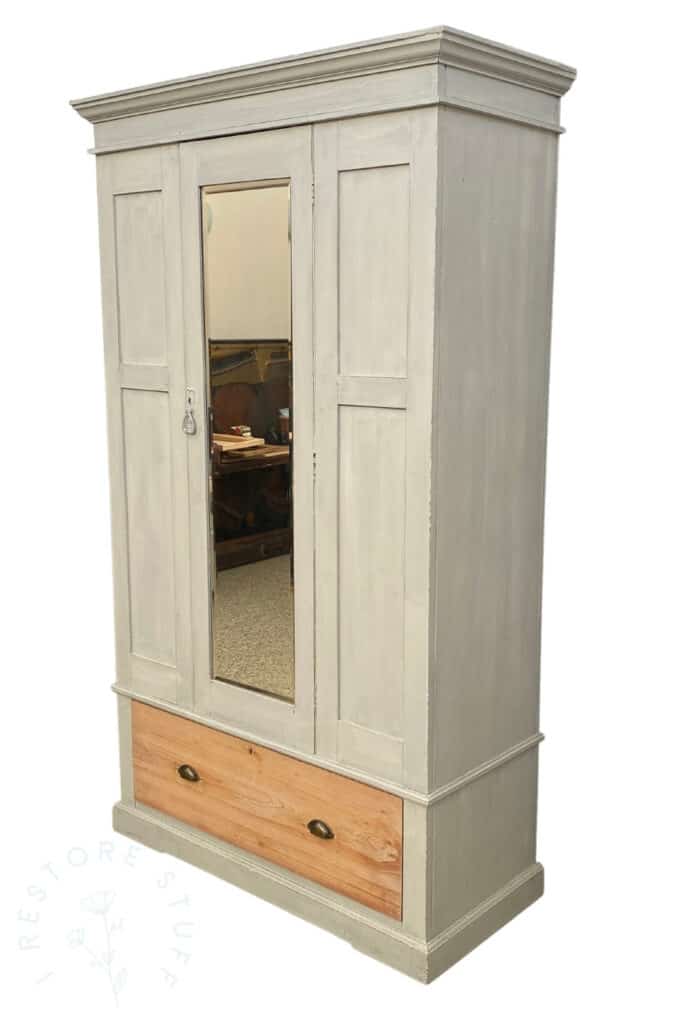
And here’s the finished wardrobe makeover. I used Canva to crop the background out of this image so you don’t see my messy workshop floor. LOL.

large wardrobe makeover in Mora colour.

You’ll find me on social media with more tips and DIY tutorials on Facebook and Instagram.

You can also find me when you’re looking for things on Youtube and Pinterest!

But please, leave a comment if you enjoyed this or have any questions about the project or using Milk Paint. (North American readers, you’ll find Milk Paint here)

4 Comments

Previous Post: « Upcycled Wooden Index Card Box
Next Post: Old TV Tray Tables? Give them a Farmhouse Style Makeover »

Reader Interactions

Comments

  1. julie Caudle says

    at

    wow, you did a great job,,I have never used white wax. I would love to try that,the color looks great with the natural wood tones . When using white wax is there any other products or prep work , other than stripping the furniture that needs to be done???

    Reply
    • Sharon HankinsSharon Hankins says

      at

      Hi Julie, thanks so much. Yes, when using white wax on raw wood, just make sure the area is clean and free of dirt/dust. If there is any varnish on the wood, yes, it needs to be stripped or sanded back first.

      Reply
  2. Dianne 0435 059 009 says

    at

    Would you be interested in a very old wardrobe that would love a make-over? It has hanging one side and shelves/small drawers other side. It is is 1750cm H, 1180 W, 565 D and presently white painted. I don’t know how old it is but it has been in the Manly Croquet Club (Sydney) since 1967 and was probably donated. I could send photos. We don’t want payment – FREE – but you would have to collect.
    If you are interested please contact me.
    Dianne

    Reply
    • Sharon HankinsSharon Hankins says

      at

      Hi Dianne, Thanks for asking but I am currently out of storage space for any more furniture pieces.

      Reply

Leave a Reply Cancel reply

Your email address will not be published. Required fields are marked *

This site uses Akismet to reduce spam. Learn how your comment data is processed.

irestorestuff

How to paint furniture & grow your hobby into a thriving biz!
Furniture paint: upstairs in Camp Hill Antique Centre, Qld. Australia.

Sharon Hankins | Furniture DIY
Refreshed the Lamp White colour on this Hampton st Refreshed the Lamp White colour on this Hampton style office desk ready for marketplace. 
Enquiries welcome if you’re happy to pick up from Park Ridge. 

#hamptons #officedesk #lampwhitefusionmineralpaint #fusionmineralpaint
If you received my email news this week, you may h If you received my email news this week, you may have seen a chance to score yourself a sample pot of Artisan Mineral Paint. AND - I sent out my latest tutorial video on how to use Artisan Mineral Paint with their glaze to makeover a cute side table (pictured here). Let me know if you missed it. 👇
You’ll find all these goodies and more in my boo You’ll find all these goodies and more in my booth upstairs at @camphillantiques this week. Always treasures to find throughout the Centre. 

#camphillantiquecentre #vintagebrisbane #antiquesbrisbane #brisbaneantiques #brisbanevintage #brisbanecollectables  #furniturerestoration #brisbane #vintagestyle #antiquefurniture
USA Sign makers! For 2 days only, you can save 10% USA Sign makers! For 2 days only, you can save 10% off on Pre-Orders of Essential Stencil's Southwest & Outdoor collection! 🌵🦌🏜

🛒 Apply my affil code: IRESTORESTUFF for a further 10% off the bundle.

💥 Bonus set of BRUSHES (stencil bridge fine/artist brushes)
Use my link in bio.

 #essentialstencil #essentialstencils #essentialstencilsale #essentialstencillives #usastencils #signmakers #stencil #stencilart #stencilstuff #stencildecor
Swipe to see this easy refresh of an a-frame chalk Swipe to see this easy refresh of an a-frame chalkboard. Before: see how the writing has been “burnt into” the chalkboard?
1. Check to see if chalkboards are removable. These could lift out easy like a picture frame backing. 
2. Refresh the boards with a coat or two of chalkboard paint. For this one I used @fusionmineralpaint in Coal Black. 
3. Refresh frame with your choice of stain. This frame was unfinished raw pine. I used Fusion’s Stain & Finishing Oil in Driftwood. Wipe on & remove excess with lint free cloth. 
4. Voila - finished! 
Note: remember to “season” your new chalkboard before use so that your message isn’t permanently burnt into the board. 
Seasoning: using a piece of chalk on its long side, rub over the entire surface, then rub surface with a dry cloth all over, spreading the chalk dust evenly across surface. Use a clean cloth or chalkboard duster to rub away chalk dust. Your surface is now seasoned and ready for use. 
Save/bookmark this post for future reference. 😁

#fusionmineralpaint #paintitbeautiful #fusionmineralpaintaustralia #chalkboardsign #seasoningchalkboards #upcycledecor #refinished #recycledecor
Load More...

Looking for something?

Let’s Connect

  • Facebook
  • Instagram
  • Pinterest
  • YouTube

Shipping & Returns | Privacy

Looking for something? Search here:

Looking for something?

Copyright © 2022 · Refined theme by Restored 316

FREE SHIPPING Australia wide over $150 Dismiss