
Removing paint can be a chore
You’ve probably Googled “How to Strip Paint” a number of times, if you are like me, and tried a gazillion ways to remove paint from furniture. This quick and easy tip is bound to have you trying this out next time. Here’s How to Strip Paint the quick and easy way.
I’d like to introduce you to one of my loyal Facebook followers. Elisabeth is an avid DIYer and often pops up on the same DIY Facebook groups I’m a part of with lots of great tips and advice.
When I saw this tip along with Elisabeth’s pictures of her first time trying it, I knew there’d be more of you out there who would benefit from this very easy DIY trick!
Guest Post – by Elisabeth Crowe
 Guest Post – by Elisabeth Crowe
CONTEMPLATING BECOMING A STRIPPER? … A paint stripper, of course!
I know some paints don’t require you to strip the existing layers, but here’s a handy hint – just in case.
If you’re struggling to remove decades-old layers of paint or varnish, and the fear of spending hours or days, doing a work out with your abrasives, is really putting you off – fear not! This little trick of how to strip paint, may be just the thing to put a smile on your face!
I’ve been stripping two old doors from my childhood home. The house was built in the 1920s, so there was about 85 years of paint and varnish on them. It’s been hard slog, I must say, until I recalled this handy hint on how to strip paint. I’d glimpsed it once in a photo but have never heard anyone talk about it, or recommend it, but I thought I’d give it a go.
This is easy to do, doesn’t require fancy equipment, and gives excellent results!!
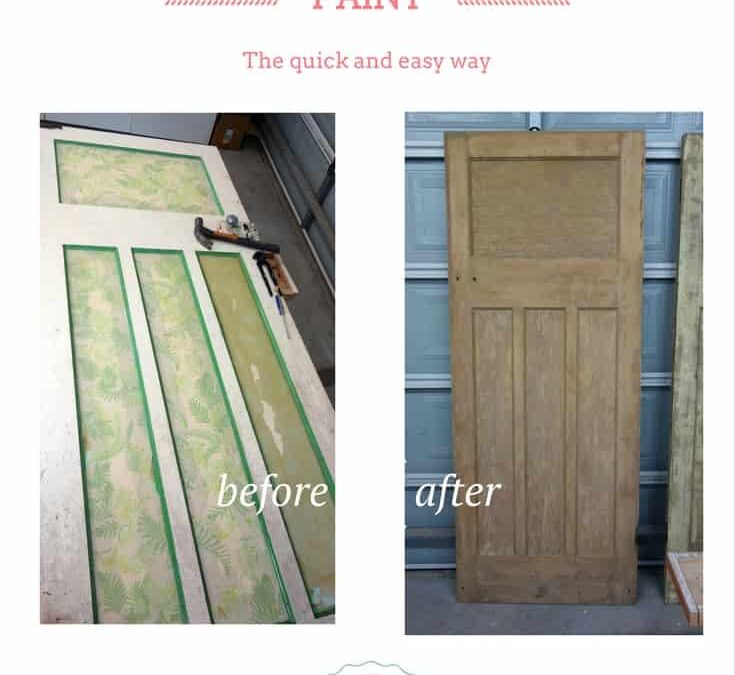
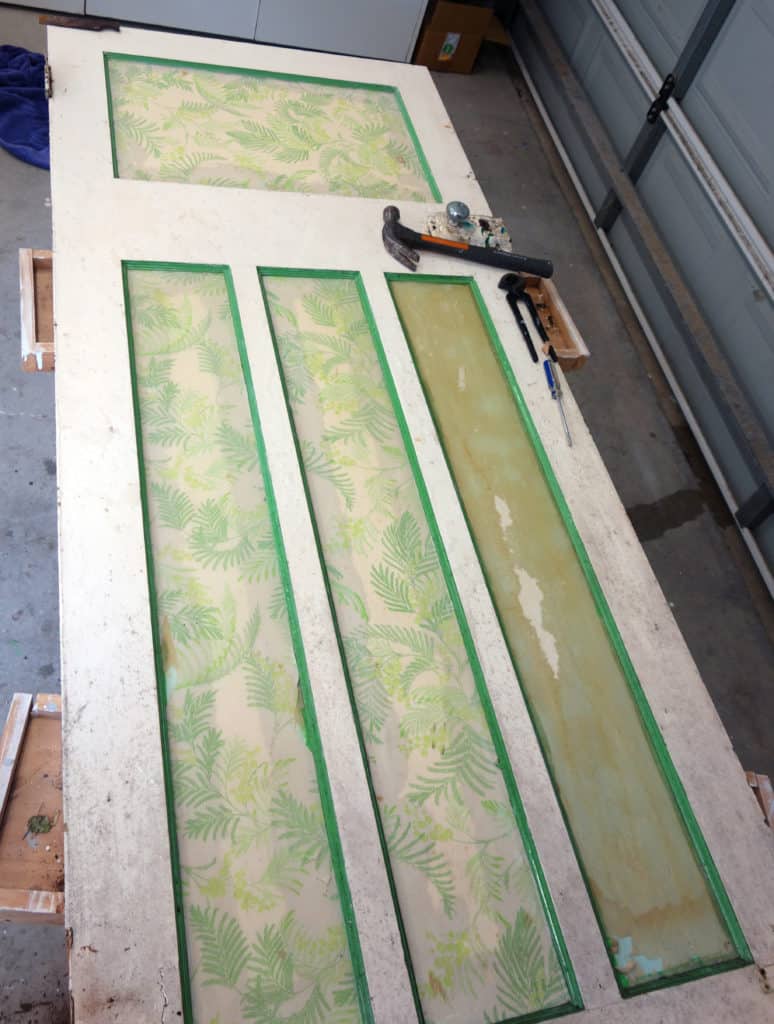
Let’s take a look at the original condition of the doors, complete with wallpaper within the panels:
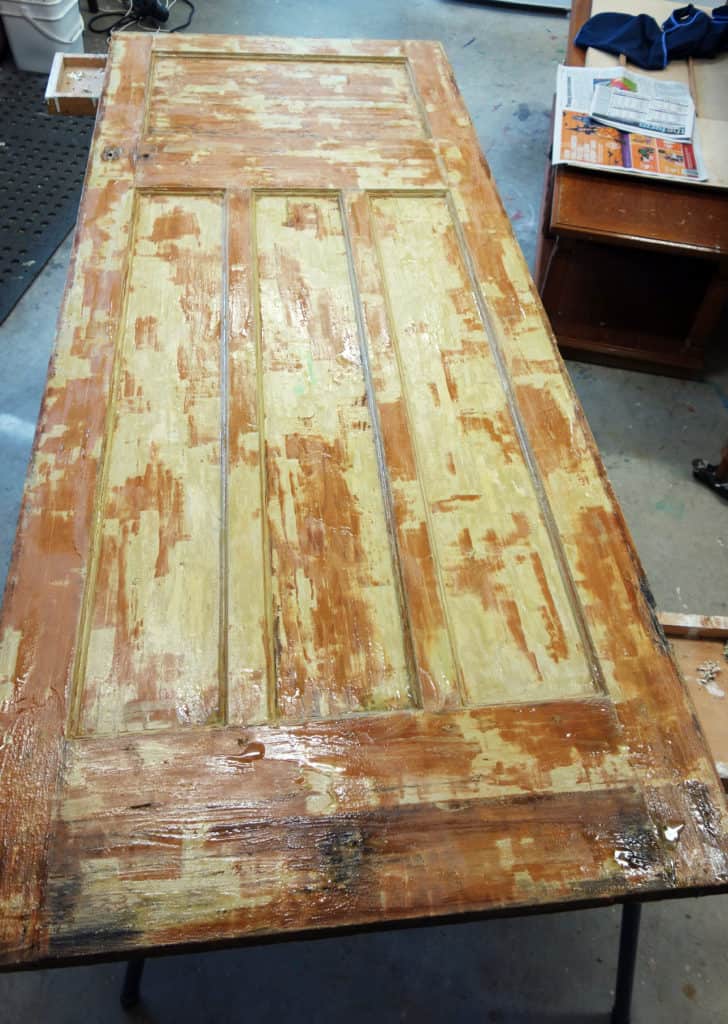
Here’s the first door I worked on, BEFORE I remembered the easy stripping method I’m about to show you (below). And this is after the FIFTH coat of stripper! Took me D-A-Y-S!
Here’s my Step by Step on How to Strip Paint:
- Gloves and apron on! Add a mask if you’re using a stripper that smells nasty.
- Take your preferred paint stripper and slather it onto your piece of furniture. I used one of the ordinary sort, which may have been Diggers brand (?), and this worked brilliantly! You could try the more environmentally friendly strippers (eg. Citristrip Affiliate).
- Be generous and put a good thick layer onto your item.
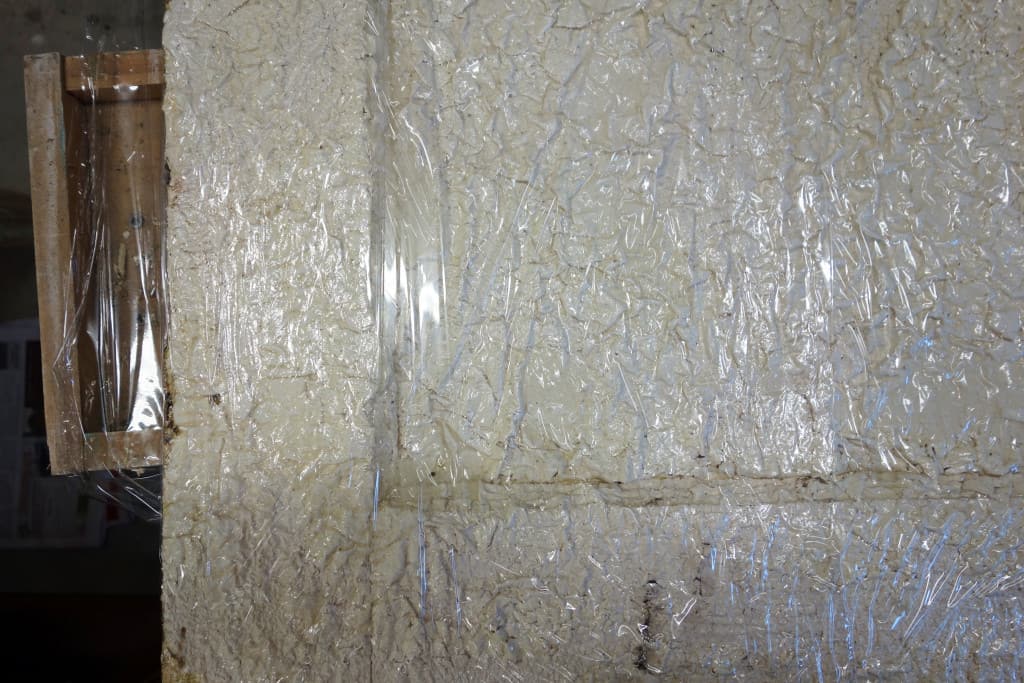
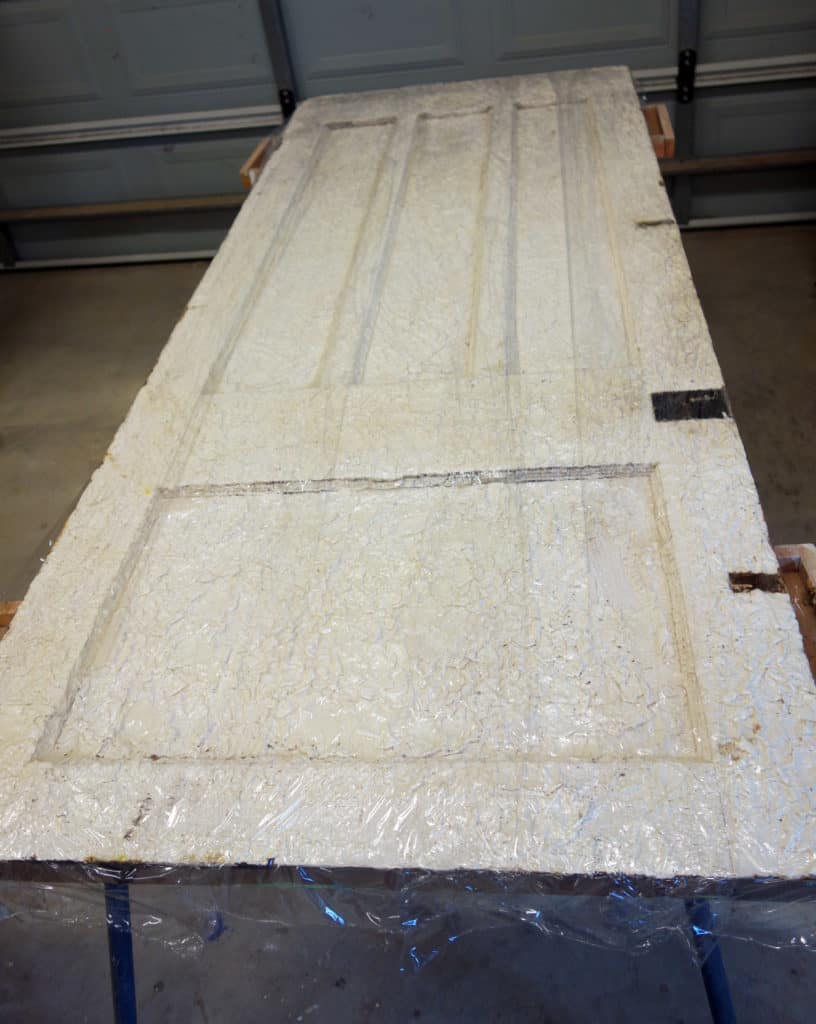
- Get your good old plastic wrap – yes lunch wrap/Glad Wrap or the equivalent – and lay this down over the stripper, extending a small way past the ends of the piece.
- Lightly press this down all over the paint stripper, trying to remove as much air as possible. Continue to apply the plastic, slightly overlapping at the edges.


- Then, step away from the furniture! Yes, just walk away (maybe go for a drive and collect freebies off council strips – just a thought), and stay away for 1.5 to 2 hours.
Ready for the Magic?
- Return to your project and slowly peel back the first piece of plastic. I found it’s easier to peel back sections, and scrape it off as I went, rather than peel it all off and have to hurry. A lot of the layers of paint will simply peel off with the plastic.
- What’s left can be easily removed with a gentle scraping.
- I then wiped any residue off with scrunched up newspaper, until all the stripper was gone.
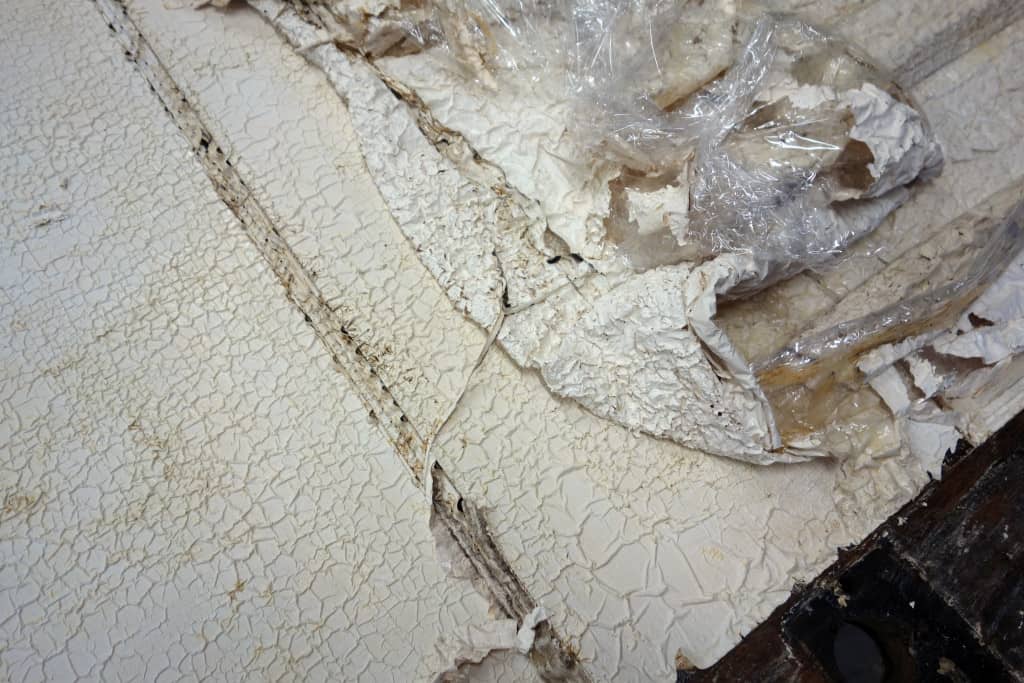
Peeling back the plastic wrap.
- Here I’ve peeled back the wrap. You can see a lot of the paint has lifted off with the wrap. Then I’ve scraped the paint back – right back to the original 1920s varnish. It really wasn’t at all difficult to remove, and only took 20 minutes, including the detailed work on the moulding.
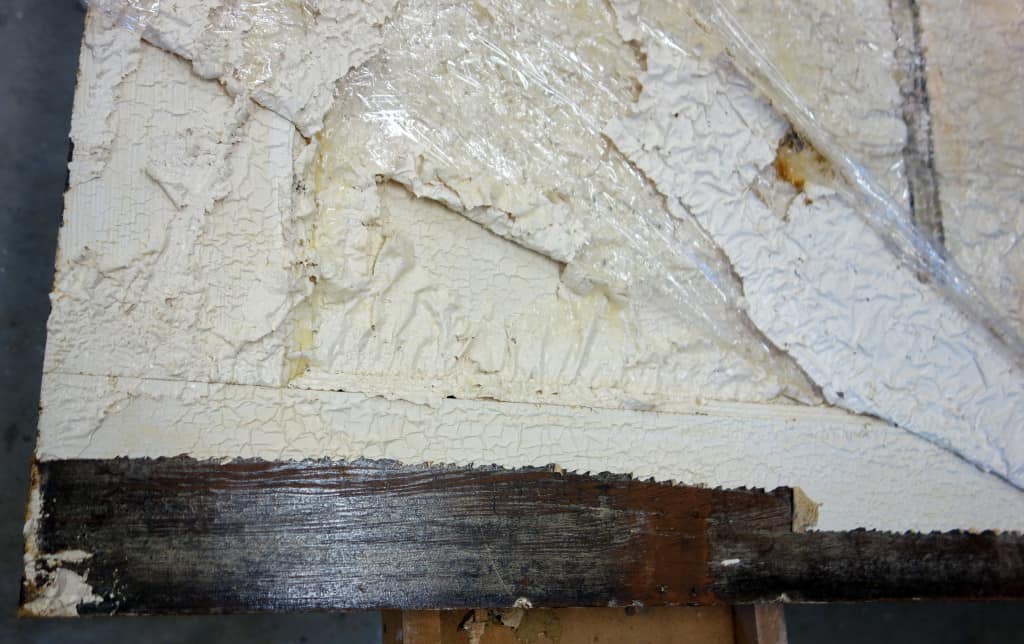
See the bottom has been gently scraped off.
- If needed, repeat the process.
- My door took two goes, and it was so easy to remove. Quite pleasant actually – I never thought I’d say that!
The Bonuses:
- I didn’t damage any of the moulding on the door doing it this way. The previous door that I had stripped without using the plastic wrap – only stripper and scraper – was pretty damaged.
- It also took far less coats of stripper than the previous door. After numerous coats and scraping on the first door, the paint still wasn’t removed anywhere near as well as my new-found method, using Glad Wrap (affil).
- I didn’t have to sand very much at all using this method. I just gave a gentle sand with 220 grit, and the door is beautifully smooth.
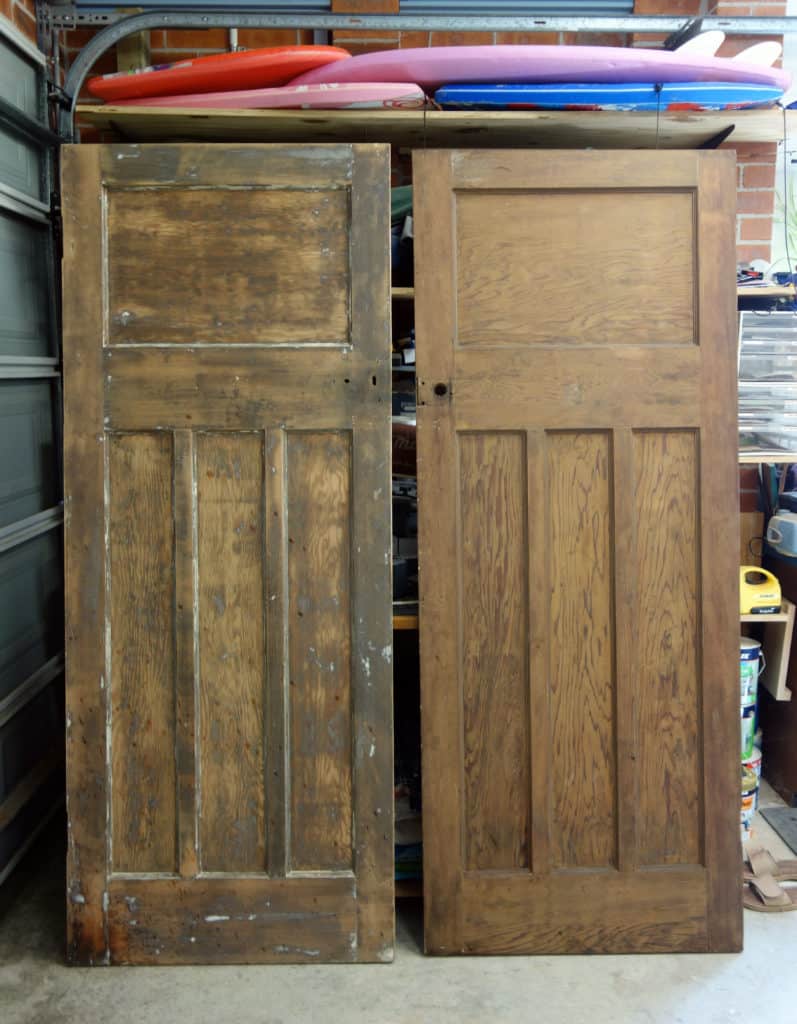
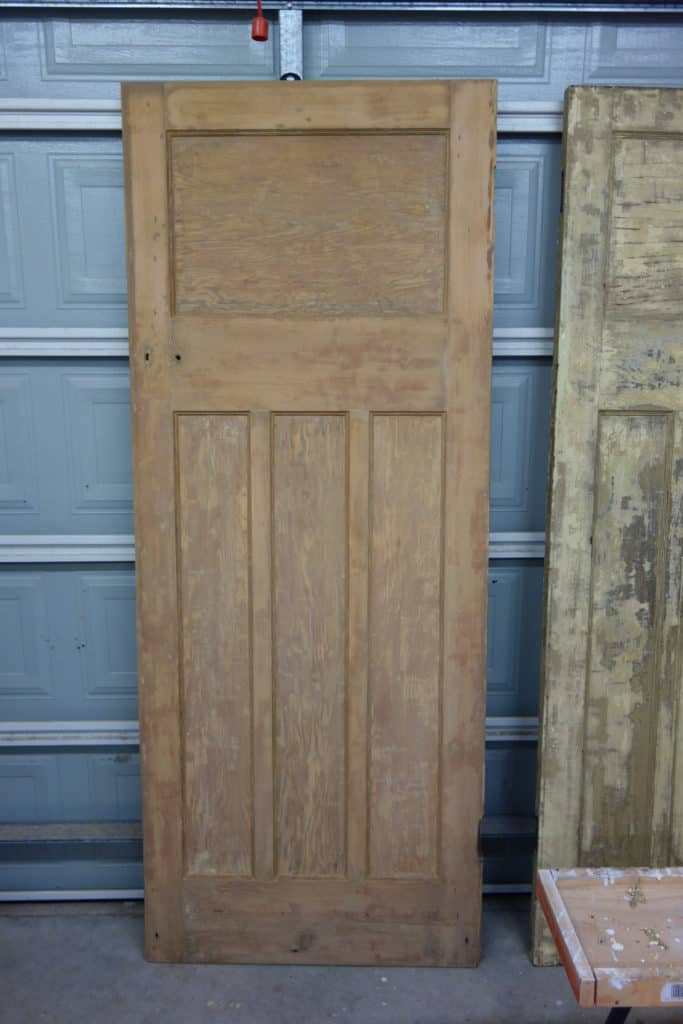
Left: without cling-wrap; Right: using cling-wrap
The finished item is on the right. You can see that, even though the whole process was so much easier, and time efficient, the result is also much better. With the first door I actually damaged some of the moulding, trying to remove the built up paint. None of the better door is damaged at all. Far too easy!
Hope you find this useful! ☺
Cheers,
Elisabeth.
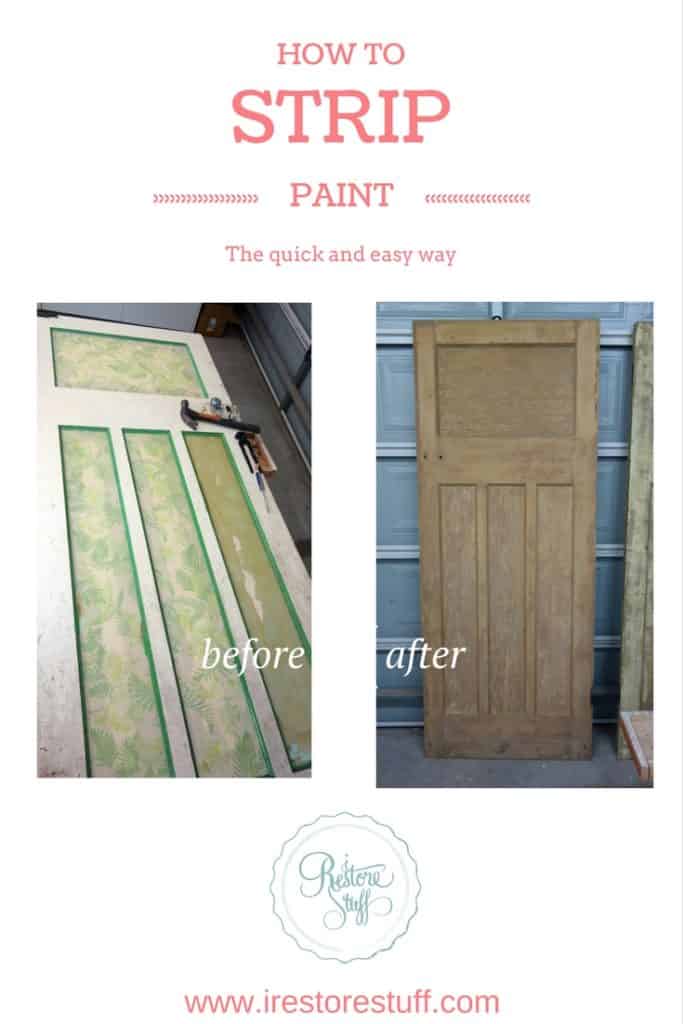
I’d like to thank Elisabeth for passing on this valuable tip on how to strip paint, and I hope you find it “share-worthy”. Please feel free to Pin and share to those who ask you how to strip paint. Here’s a pinnable pic for you to share:
Can this method be used with varnish alone?
Yes, either paint or varnish.
I’ve started stripping my bedroom doors years ago messed it up 🫣 I decided to give it another go yesterday and realised why I’d given up previously 🤪 I’ve just seen this and will give it a go thank you 😊
Oh that’s great. Let me know how you go.
We over sprayed too many coats on our brand new solid core shaker style doors for our house build. The paint just slid right down and globbed up. Quite a mess. I was about to start sanding like a mad- woman when I thought better and eventually found this post. I’ll give it a go! Thank you SO much 🙂
You’re so welcome.
Hi
I am just after the cost to strip doors of paint?
We have three that we would like to have stripped.
Do you do this for other people or is this just a personal project you do
Where in Melbourne are you located please? Thanks
Holly
I don’t strip doors, no, and I’m in Brisbane, but if you do a Google search for “paint stripping Melbourne” you will see there are a few near you.
I got excited when I saw this as I had a 130 year old door to strip. I tried the same method but have to say it was an absolute mess. There were so many layers, some plastic paint, some oil paint, and the last layer was something bizarre like thick chalky crayon. It was all hard to get off even after, didn’t peel off nicely with the plastic, and I damaged the door in numerous places with the scraper because underneath was a very soft cedar. Cost a fortune in paint stripper too. All in all a disaster. I dare not try the other side of the door, let alone the second door I was planning to do.
Yes, some of the older pieces with layers of paint will take a few different applications of stripper. You do need to be gentle with the old wood, and scrapers can gouge if not careful. Mine never usually comes off nicely with the plastic, I usually remove the plastic, and the stripper with paint scrapes off a little easier than it does without the plastic – it simply keeps the moisture in, instead of drying out so quickly without it. If not confident, there are professional paint strippers who do this chemically, but it does cost a bit.
What is the easiest way to remove the paint from the grooves and rounded details of the door? The stripper I’m using doesn’t cause it to peel off but turns it into a goo.
Thanks!
There are tools you can use to get into the grooves, but if you don’t have a special tool, something like a screwdriver (used gently so as not to cause damage) might work. Yes, it does sometimes form a goo, so keep scraping away excess, then use some 0000 steel wool dipped in water to slough away the stripper (assuming stripper is water based). Always use gloves.
Looking forward to trying it. Do you have a tip for removing paint from skirting boards and architraves?
You could try the same way, or just use the stripper without the plastic wrap. Just need to make sure you have plenty of protection for your flooring, etc.
Thank you for the easy tips, I am going to that method at my sons place
can I use this method on an outside metal table? I’m in Florida and we’ve had a cold smell and I got up and all the painted peeled off my table and I’m slowly getting it off but I have bad hands so it’s not sure what’s going to work.
Hi Anne, yes you can use a stripper on metal. If your paint has all peeled off your table, though, you may not even need a stripper. Just sand off any remaining bits of paint.