

Quality Brushes – essential tools for your Furniture Painting Kit!
There’s nothing like great quality brushes to get the best finishes on your painted furniture pieces. Years ago, I used to buy the cheaper chip brushes from the local hardware store, to save money, of course, but had no idea what a difference it would make when I purchased my first really good quality brush.
I had heard of Cling On Brushes and when I heard they were coming to Australia, I decided to give them a try with the thought of perhaps adding them to our line of products to compliment the paint lines I carry.
I was part way through a bedroom suite makeover, when I was painting the bed and had laid down the first coat with my regular old chip brush. I remembered I had received my new Cling On brush the day before, so for the second coat, I picked up the new brush and gave it a whirl.
Night and Day, People!
Seriously, it was like chalk and cheese, night and day, all of the analogies that mean “world of difference”. The paint glided on effortlessly, the finish was smoother than before, and I seriously finished the second coat in half the time as the first coat. I think this was also due to the fact that the Cling On Brushes held more paint, than my regular little chip brush.
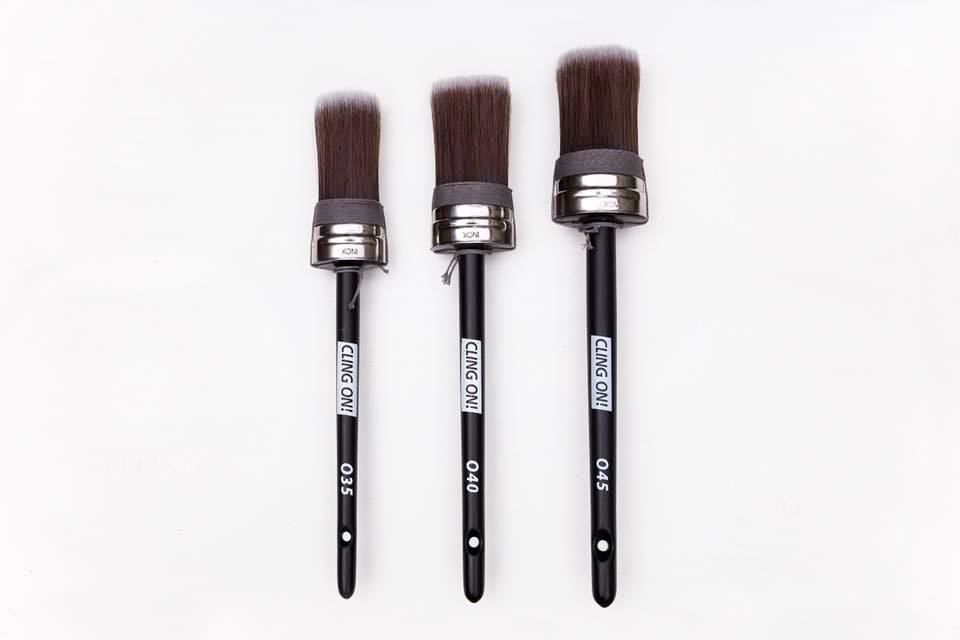
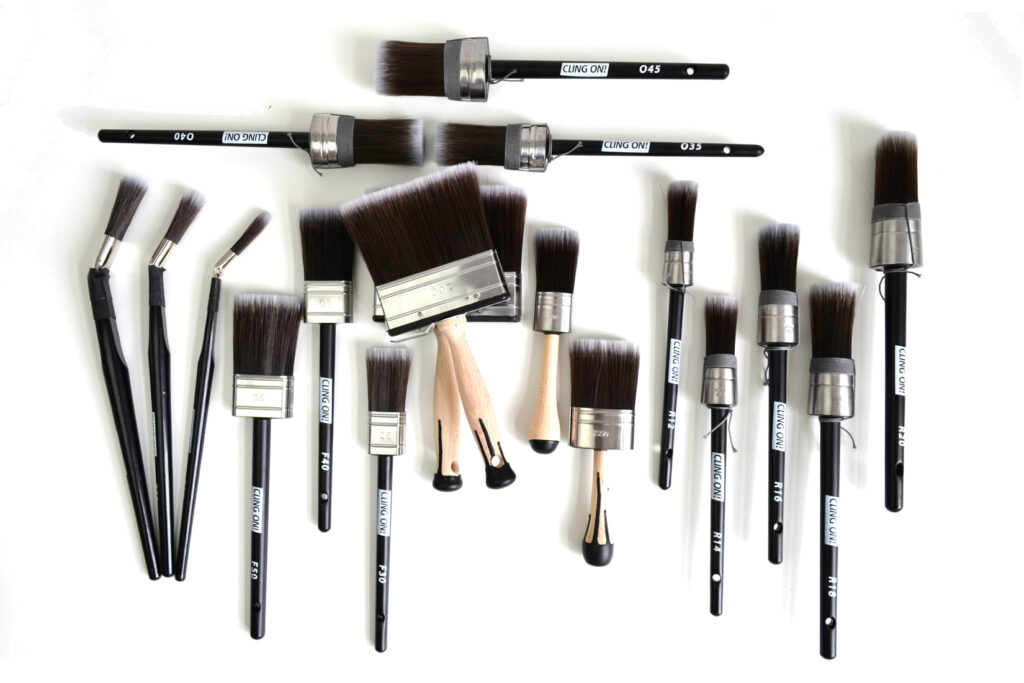
Cling On Brushes come in a few different shapes and sizes – Flat, Oval, Round, Bent, Angled and a Short handled “Floval” (kind of a flat/oval combo).
Staalmeester Brushes
Another great quality brush is the Staalmeester brand – again, I tried it out, and discovered they are just as good as the Cling On Brushes. I especially love the “self-cleaning” factor about both of these brush brands – but more about that in the next part of this post.
We stock a few different sizes in the Staalmeester brush in both flat and round versions.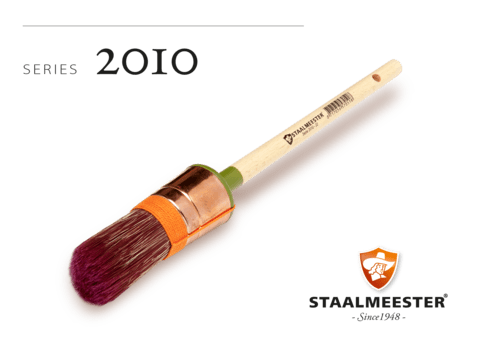
Do you have a favourite brush? Drop a line in the comments below and let me know.
Five (5) Top Tips to help your brushes last longer!
Follow the manufacturer instructions. As with most things you purchase that are great quality, if you adhere to the makers directions, you’ll get the most out of the product and prolong the life of your investment. So for both of these brushes mentioned above, here are my top tips for caring for and getting the most out of your Cling On and Staalmeester brushes.
*NOTE – if you purchase Cling On Brushes from me here in Australia, I send out Care instructions with every order.
1. Your Brush’s First Use
Before their first use, dip your brush into water to moisten the bristles and help give them a bit of flex. You only want to dampen them, then either flick out the excess water by giving them a good shake or spin, or dry off with a cloth or paper towel. You may notice on the oval or round brushes, the string binding the bristles near the top of the ferrule – do NOT remove these. They are there to help the brushes keep their shape.
2. Application
When using your brushes, dip the brush into the paint only to about half way up the bristles at the most – there is no need to apply paint all the way up to the ferrule. There’s nothing worse than having paint all caked up on your brush, and it seems to have a way of creeping up the handle if you’re not careful. Hold your brush at about a 45 degree angle and lay the paint on in nice long strokes going with the grain, as opposed to pushing the paint on. If using our Fusion or Artisan mineral paints, they are self leveling, so the paint tends to even out as you lay it on. Catch any ridges that may have formed along the side of your stroke with the next stroke.
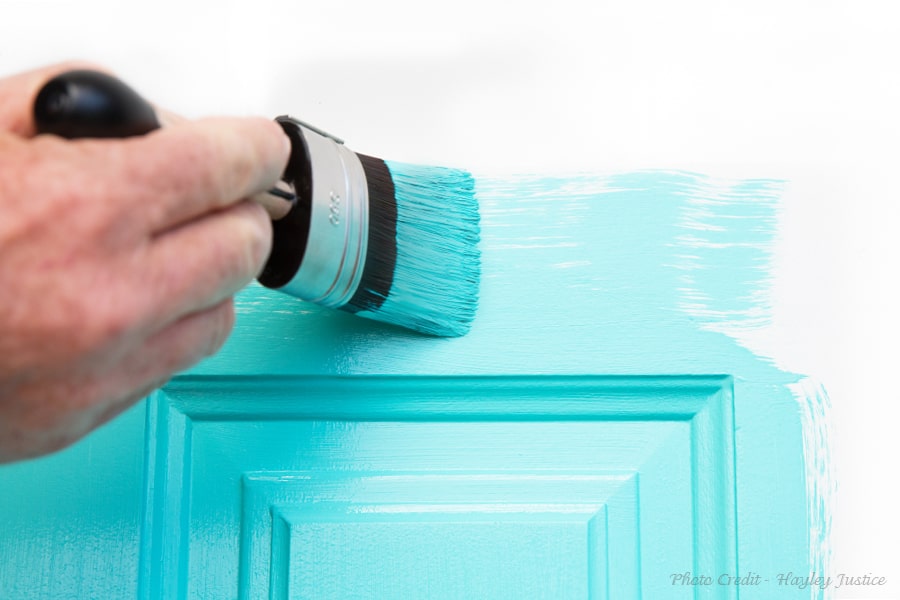
Same silky smooth application!
3. After Use
Don’t allow your paint to dry out on your brush after use. If you will be going back over the piece with a second coat in a couple of hours time, wrap your brush in a plastic bag or cling wrap to stop the paint drying on the brush. If you are not going back for a second coat, follow the next tip on cleaning your brush.
4. Cleaning Your Brush
Both of these brands of brushes, are what I call “self-cleaning”. By this I mean you won’t have to stand for hours rinsing your brush out. And again, I must remind you that these tips are assuming that you are using water based paints such as Chalk Paint, Milk Paint or Mineral Paint.
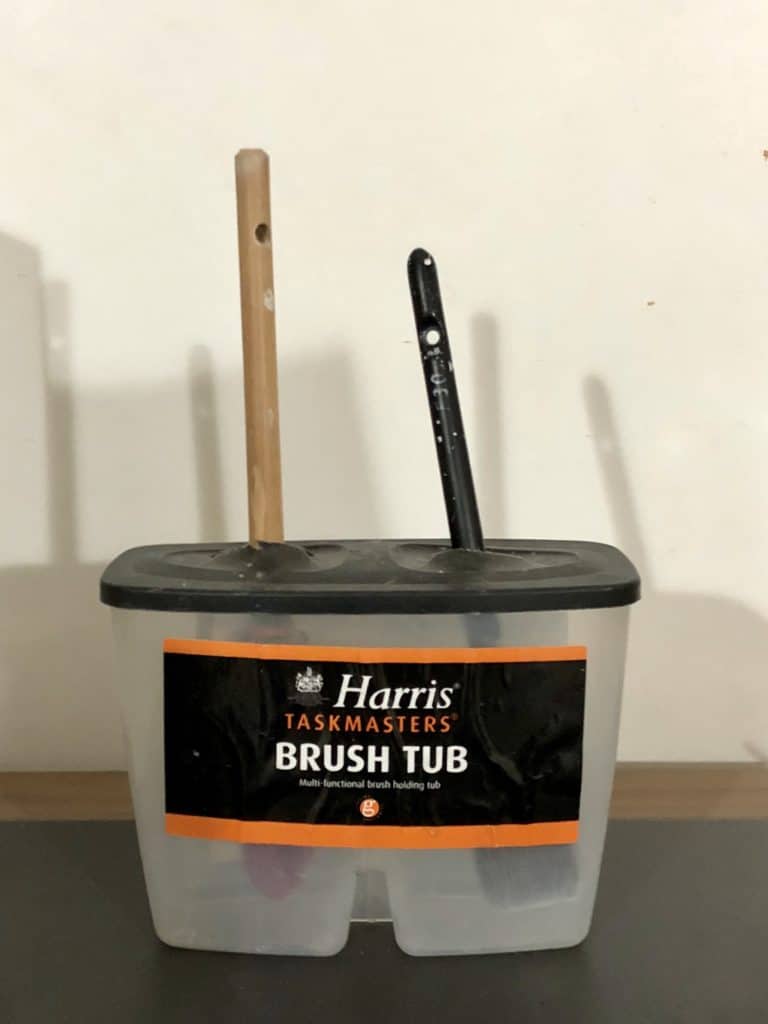
Rinse your brush under cold water or in a bucket of water to get the main load of paint out from the bristles – only for about 30 seconds or less. Then sit your bristles in a tub or container (brush holders are perfect for this), and fill with water to just under the metal ferrule. It’s important not to allow the water to sit within the ferrule metal for a length of time as this may compromise the glue that holds the bristles in place, over time.
You can make a brush holder by using a tall tub (eg. yoghurt container) with a lid, and cutting a slit in the lid to fit the brush handle through – this will hold the brush up off the base of the container.
Allow to sit in the water for an hour or so – you’ll notice the paint just falls off the bristles to lay at the bottom of the jar!
Rinse and repeat another time or two and your brush is ready to use again.
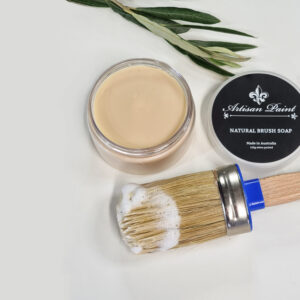
5. Brush Soap
There may be times when you’ll forget to rinse your brush immediately, or you may just get a build up of paint beginning to creep up and dry at the base of your bristles. It’s always good to clean your brushes with a quality brush soap every so often to not only get rid of built up paint, but to condition the bristles – believe me, you’ll notice a difference!
We stock a couple of brush soaps which I have found excellent for cleaning brushes, and bonus – made from natural ingredients:
- Artisan Brush Soap– comes in a round 110g jar. I keep mine at the laundry sink where I wash my brushes. After rinsing your brush out, rub the brush onto the jar of soap until a lather forms. Lather and wash bristles thoroughly, rinse and allow to air dry. I sometimes wrap my bristles in a chux cloth or paper towel as they are drying to prevent “stray hairs” – it keeps the bristles together as they dry. (Kinda like the difference between “bed hair” and day time hair if you know what I mean. Haha)

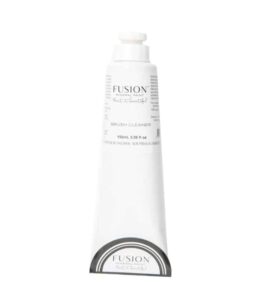
- Fusion’s Brush Cleaner – 100% natural, non-toxic and virtually odourless. Lather your brush, hands or tools with soap (only need a pea size) and rinse with water. It can be used to remove old wax, hardened and dried paint or gilding paste.

BONUS TIP – see the brush below? The bristles were rock hard after accidentally leaving it on the workbench after a Facebook live one day when I was demoing Fusion’s Ultra Grip (even stronger than the paint!) I reached out to Loree Pringle from Fusion & Homestead House Paint Company (manufacturers) who suggested that I lather the brush in Fusion’s Brush Cleaner, wrap it in cling wrap, and leave sit for a day or so. I did leave it for maybe 2 days soaking in the soap lather under the wrap – and the results were amazing. I started working the bristles between my fingers and the brush soap had softened the Ultra Grip and began breaking it down to where it was pliable and flexible. It wasn’t long after a little more manipulating and scrubbing/rubbing against my soap dish ridges, the brush was set free from the Ultra Grip completely – the image below speaks for itself. Bristles fluffed out like they’d just been washed in hair conditioner!


Pin this image to your Pinterest board to save this post!