Easy Project Tutorial
Scroll down for the full DIY Live I did on Hometalk for this tutorial.
 With Easter almost here and Spring arriving in the northern hemisphere, I thought I’d do a tutorial with my Northern friends and followers in mind for a change! But don’t worry, those of us Down Under can still join in – just because we’re in Autumn doesn’t mean we can’t liven up our homes with some floral prettiness, am I right?
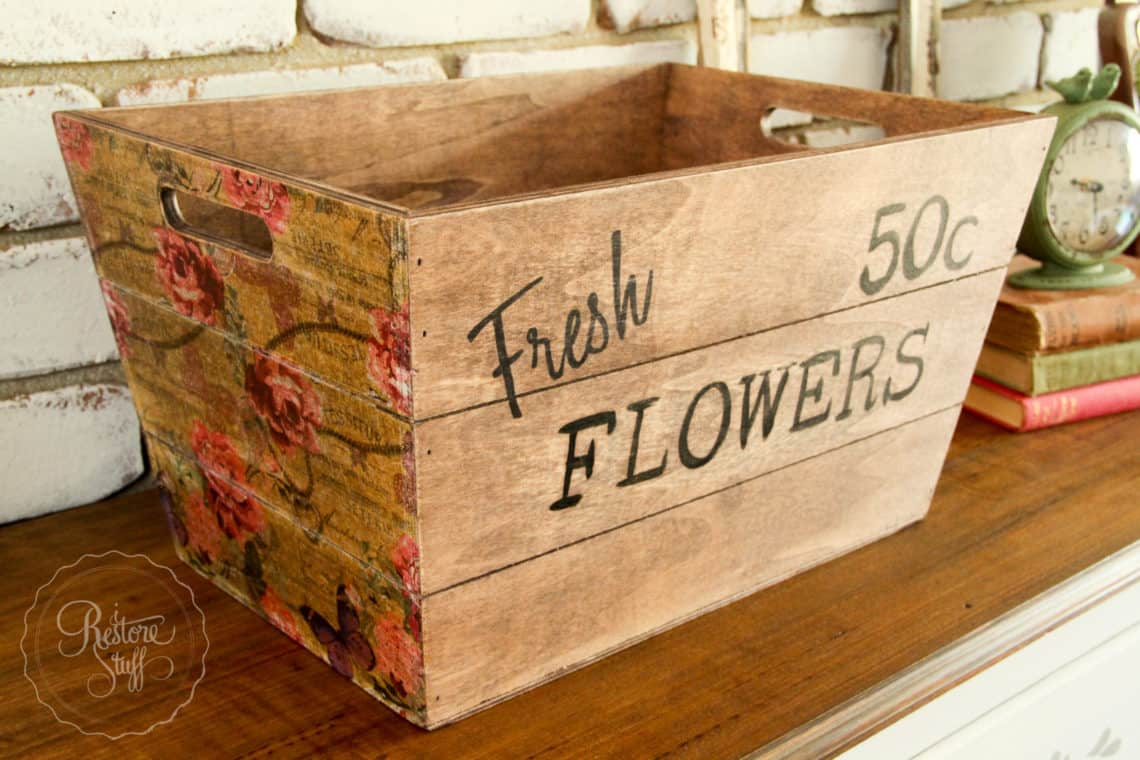
For this project, I used:
- 1 x tapered wooden box from Kmart Australia (for my USA friends, I found these on Amazon that would work just as well)
- 2 x paper napkins with floral print (I had mine on hand, but here are some I found in Australia on ebay, or here on Amazon for my Northern friends.)
- Fusion Transfer Gel (Aussies buy here, or the rest of the world, find it here.)
- a credit/store card or roller/brayer
- Carbon paper or graphite paper (check your local office/printing place or online here). Use these for so many projects!
- pen or pencil for tracing
- Sharpie/permanent marker or paint in colour of your choice – I used Fusion Mineral Paint’s Coal Black.
- Paint brush – a fairly fine one for lettering.

Step 1
Take your napkins and remove the top layer by peeling it away gently from the other one or two layers (depending if the napkin is 2 or 3 ply).

Step 2
Lay the napkin across one side of the box to make sure you know it will fit edge to edge, getting your image to how you’d like it to sit, directionally.
 Step 3
Spread the Fusion Transfer Gel along the entire side of the box in long smooth strokes filling the width from edge to edge.
Step 4
Lay the napkin gently on top of the box, trying as best you can to lay it from one edge to another edge, rather than plonking it straight down on top. I found it easier to lay it down this way, but you may find an easier way for yourself. Then very gently, using a brayer or a credit card, smooth out any bubbles or wrinkles. Remember this is tissue paper and will tear very easily, but try not to stress too much if it does, it will only add to the vintage, worn look that this technique is great for.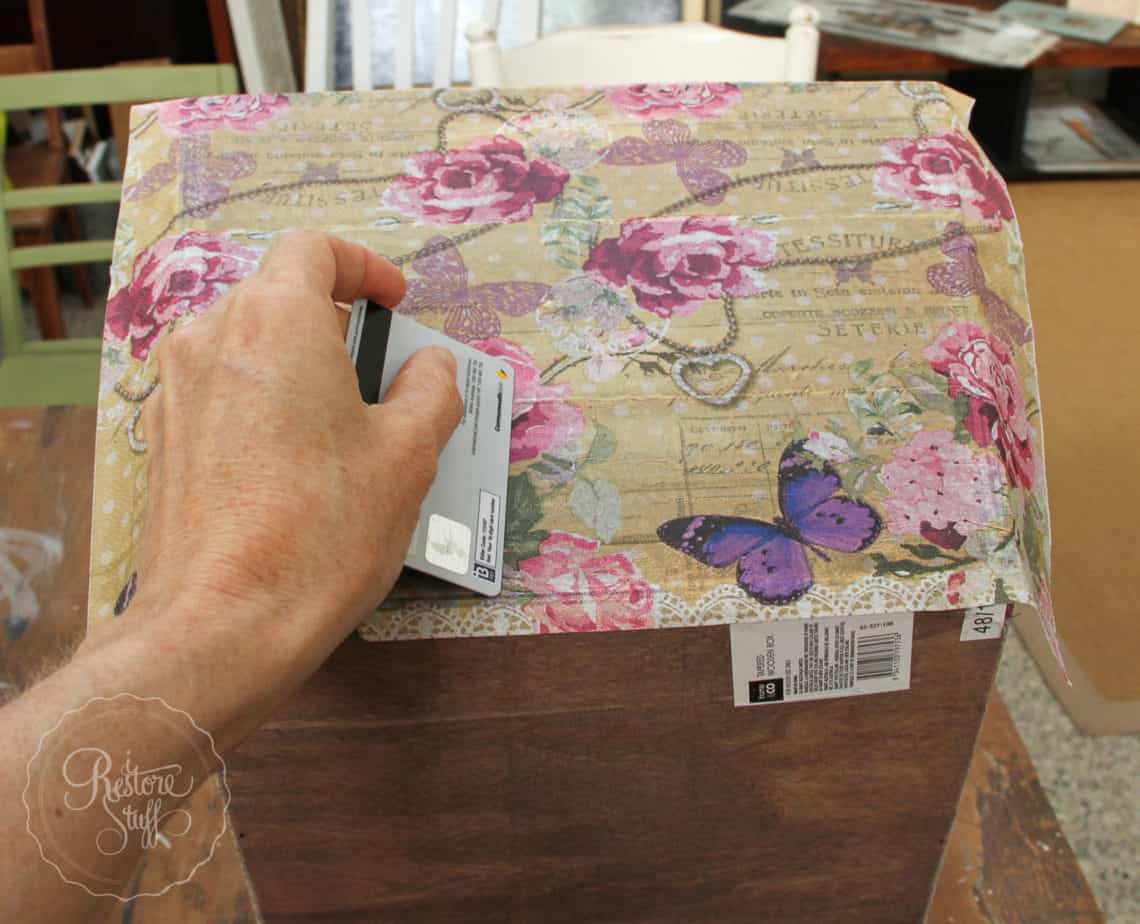
Step 5
Then using some more Fusion Transfer Gel, gently paint another smooth, even layer on top of the napkin. This helps to seal it in.

Step 6
As the decoupage medium (Transfer Gel) is drying, you can use your credit card to rub across the edges to assist in tearing the napkin away from the edge.
![]()
Step 7
Wait for the Transfer Gel to completely dry. Then with a fine grit sandpaper, run along all the edges to create a worn, weathered finish on the napkins. I even ran the sandpaper folded over and into the grooves where the “planks” join together.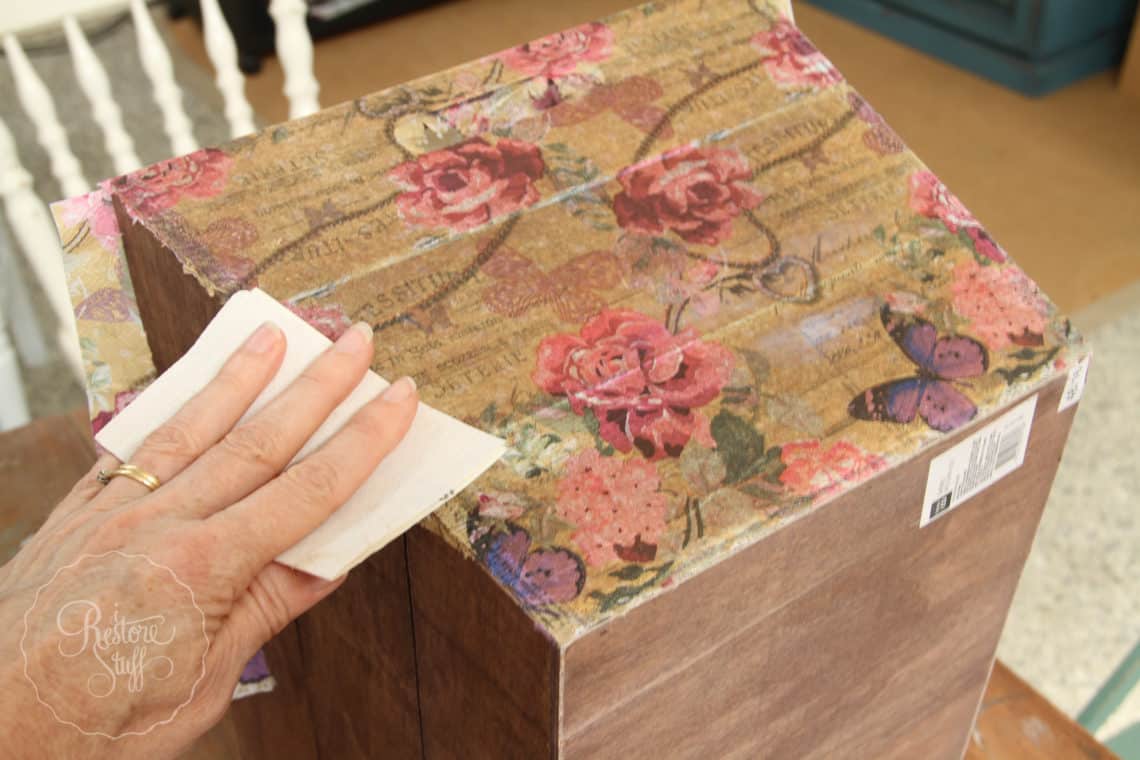
Step 8
Print out wording for a sign, which can be anything, really. I used “Fresh Flowers 50c”. Using carbon paper or graphite paper behind your words, trace over the letters exactly where you want them placed on the side of your crate. Note that I centred the word “FLOWERS”, then placed the word “Fresh” off to the above left corner, then “50c” above top right. No matter how you print out the words, you can still mix and change them on your actual piece.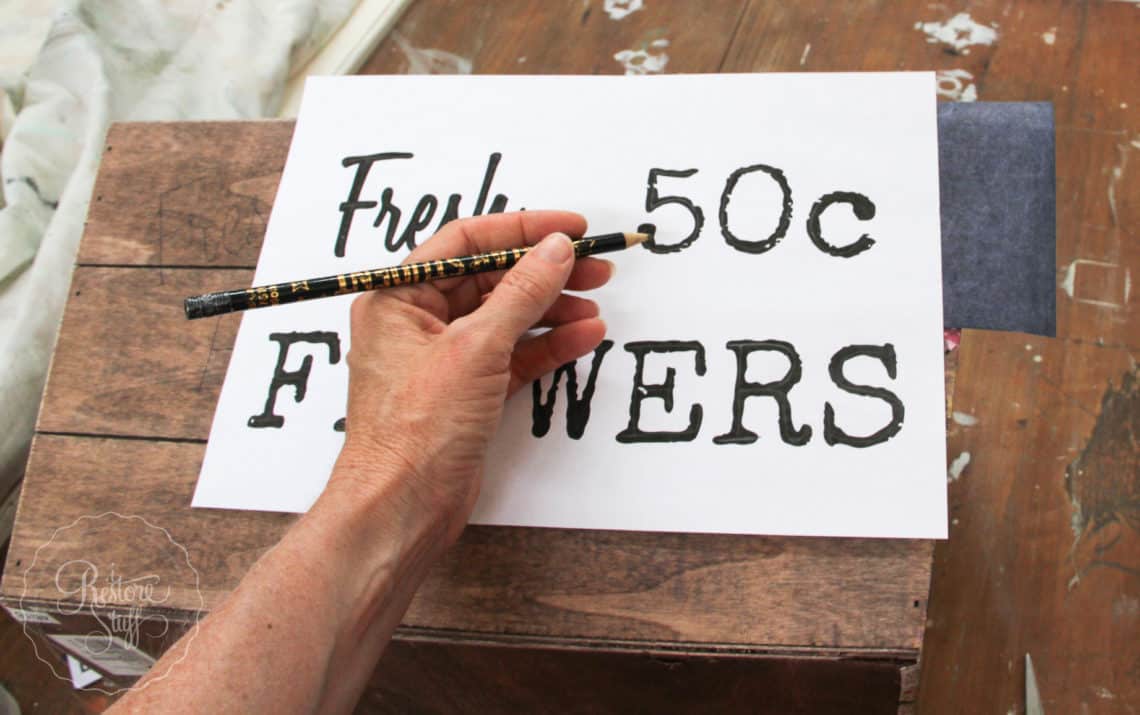
Step 9
When I traced the lettering using the carbon paper behind, I would normally trace around the entire outline of each letter. However, this time, I was going for a more “hand painted” look, so chose to simply trace down the center of the lettering to just get the basic letter shape. I then used a Sharpie/permanent marker to outline and fill out the word “Fresh”. With the word “Flowers” and “50c” I hand painted using Fusion’s Coal Black with a fine craft paint brush.
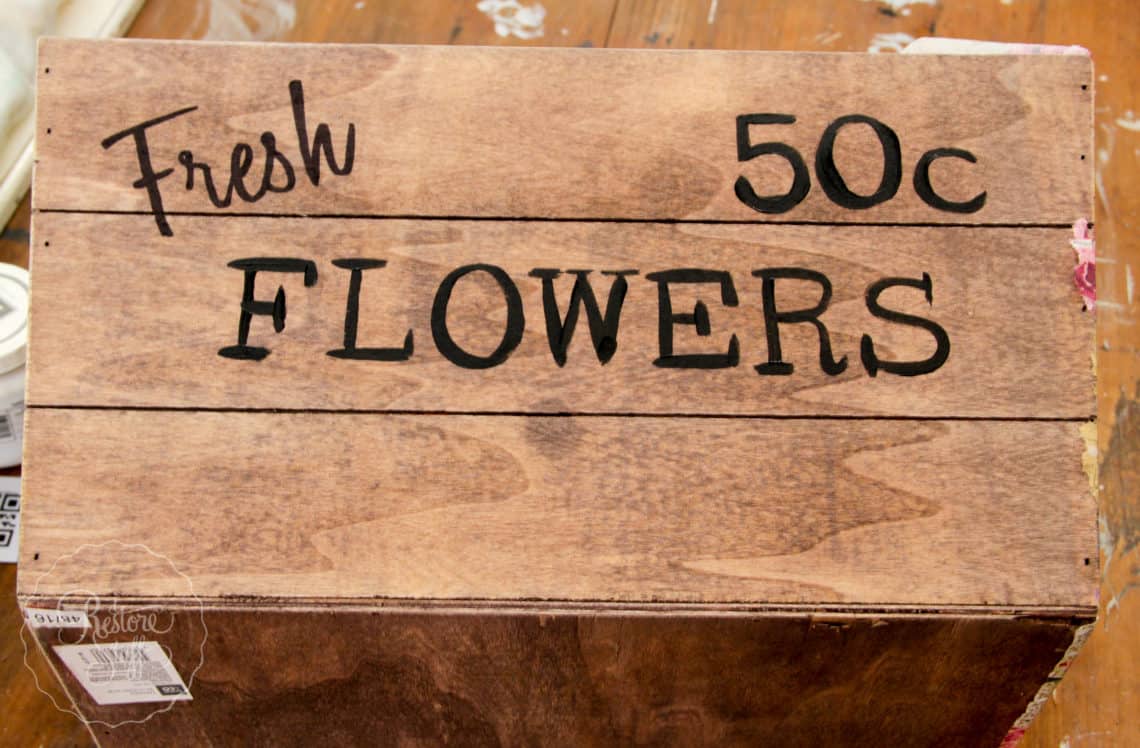
Step 10
You are done! Step back and admire your work and think of all the fun things you could use your new Spring crate for! Here are a few suggestions, can you think of others? I’d love to know in the comments!
- a huge bunch of flowers, fake or real (Tip: if using real flowers, line the crate with plastic)
- Easter Egg hamper/basket
- mini herb garden
- storage for fabric or art supplies
- magazine collection
![]()
![]()
![]()
![]()
![]()
![]()

Bonus Tip:
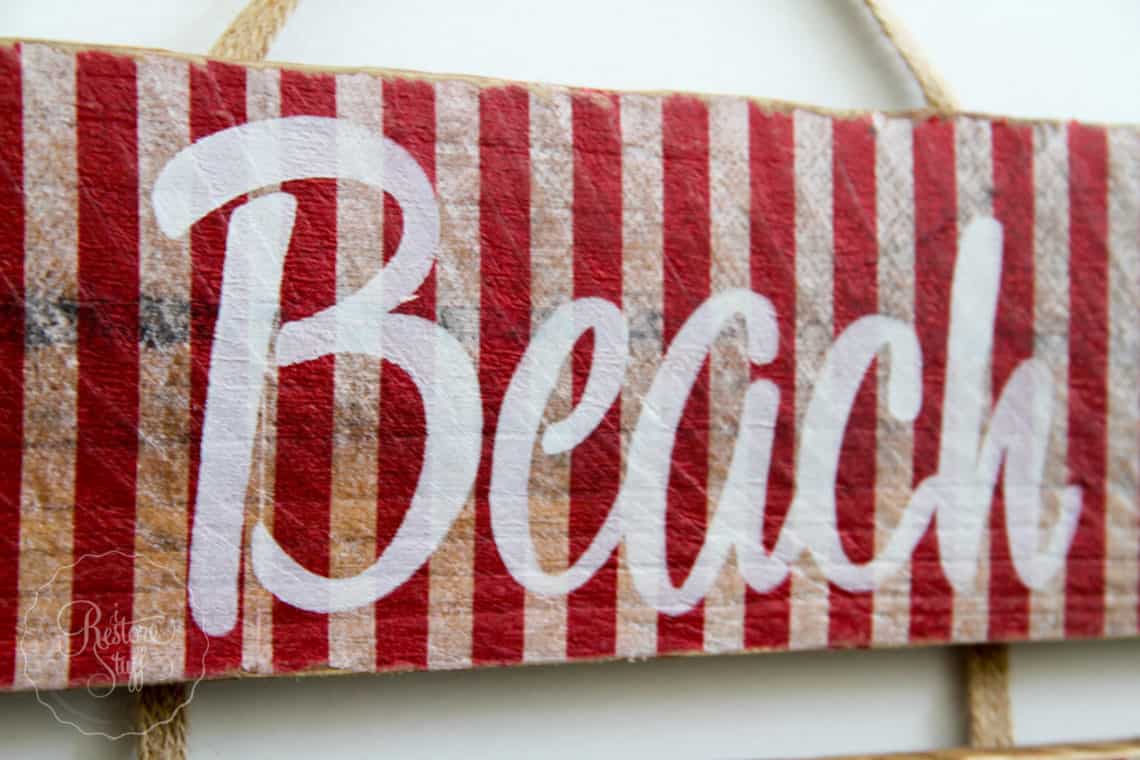
There are so many fun uses for napkins on wood and furniture. Try them on drawers. Here is a Beach House sign I made up while I was waiting for my crate to dry, using some stripy red & white napkins I had left over from a birthday party.![]()
![]()
![]()
Here’s the full tutorial as seen on Hometalk’s Facebook page when we went Live for this demo: