
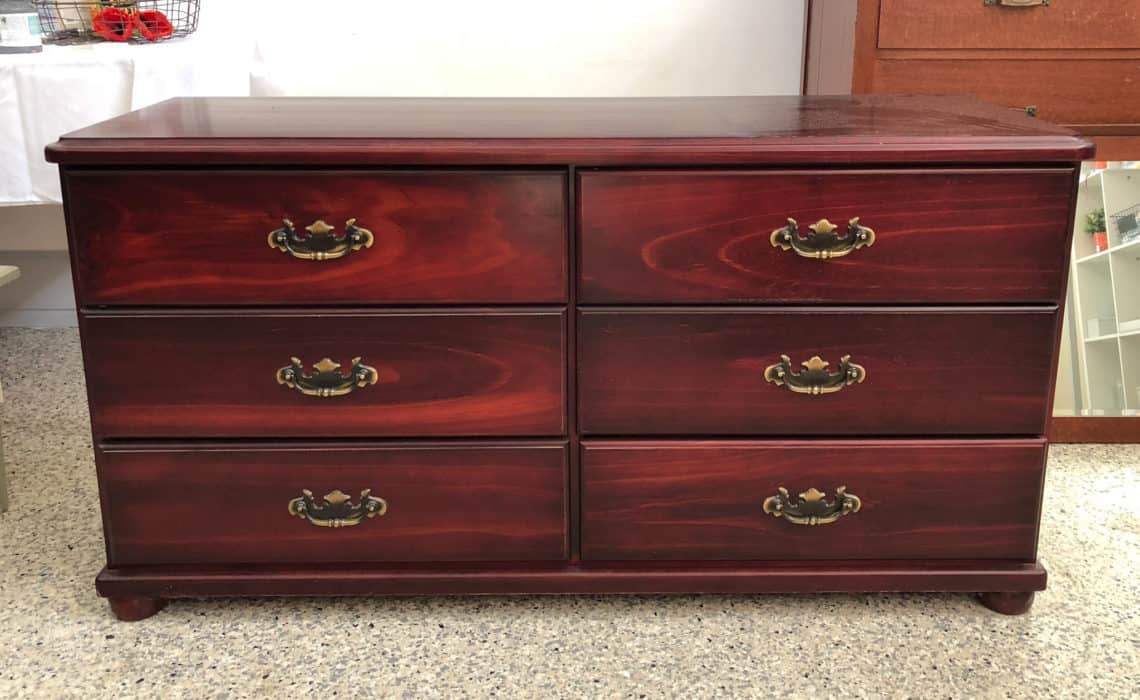
Before Makeover – Decisions to Make
This large dresser drawer set (some might consider it a side-board) was destined to be painted, but I needed to make some decisions about HOW I was going to paint it.
More specifically, what PREP was I going to use, to ensure that:
- I don’t see any of that red stain bleeding through under the new paint work, and
- to make sure the paint was going to adhere well to this very slick surface.
Prep is KEY to a great finish!
Much fuss is made in forums about furniture painting with regard to how much, if any, prep is actually required to paint a piece of furniture. Now depending on so many factors, this isn’t just a simple straight forward answer, but for the most part, no matter what brand or type of Furniture Paint you are using (see my post on the “Difference between Chalk Paint, Milk Paint & Fusion Mineral Paint“), there are some basic forms of preparation required IF you want your paint to stick and perform it’s best on the surface you’re about to paint it onto.
Fusion Mineral Paint has this fantastic flow chart available which takes you through the prep process, to determine how much prep is needed for different types of surfaces (or substrates) you may come across.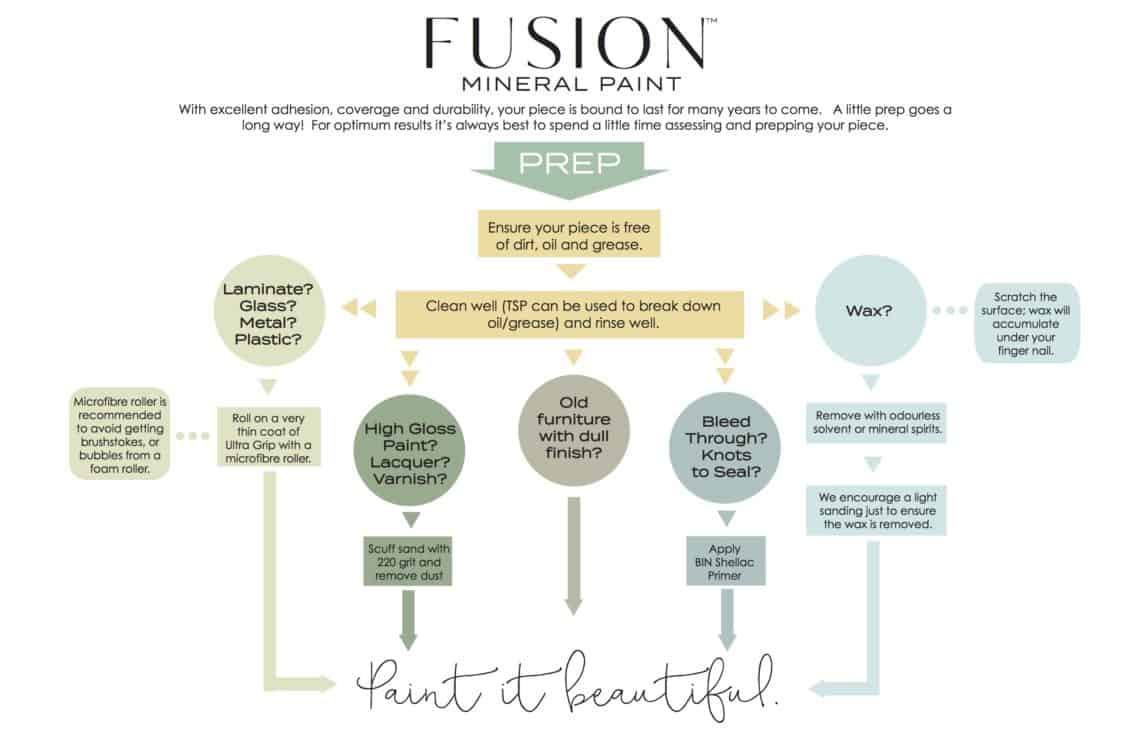
The flow chart shown, can be a useful guide to most water-based furniture paints that are on the market today, even though this is aimed specifically at Fusion Mineral Paint – which has great adhering properties as the name suggests.
For my dresser, according to the above flow chart – I know that my surface is a high gloss, lacquer or varnish (the darker green dot on the flow chart) – so should just need a “Scuff sand with 220 grit and remove dust”. It would then be ready to paint.
But wait … there’s more
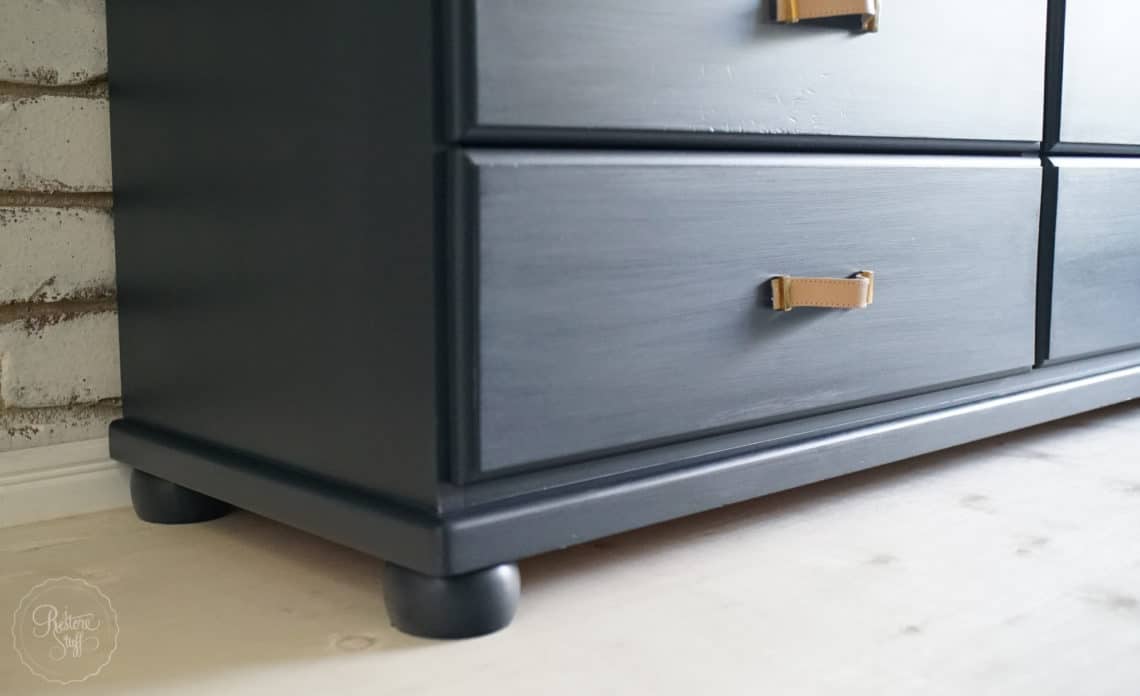
Do you see that mahogany stain on this piece? That stain is lying beneath the glossy varnished surface, and if you’ve been painting furniture for any length of time, you’ll know that these stains have a high risk of “bleeding” though the paint. So it’s important that I do NOT sand heavily enough to reveal ANY of that red stain.
Now, if I’m just scuff sanding, I really shouldn’t penetrate the varnish enough to hit the mahogany stain, so I really could be okay with just doing the light, scuff sand and then painting. But after sanding and wiping, that surface still felt quite slick, and I wanted to be super sure that my paint was going to stick to this surface.
The light green dot on the flow chart above, is a suggestion for prep on surfaces that are very slick – ie. laminate, glass, metal or plastic. The suggestion is to use a thin coat of Fusion’s Ultra Grip before painting.
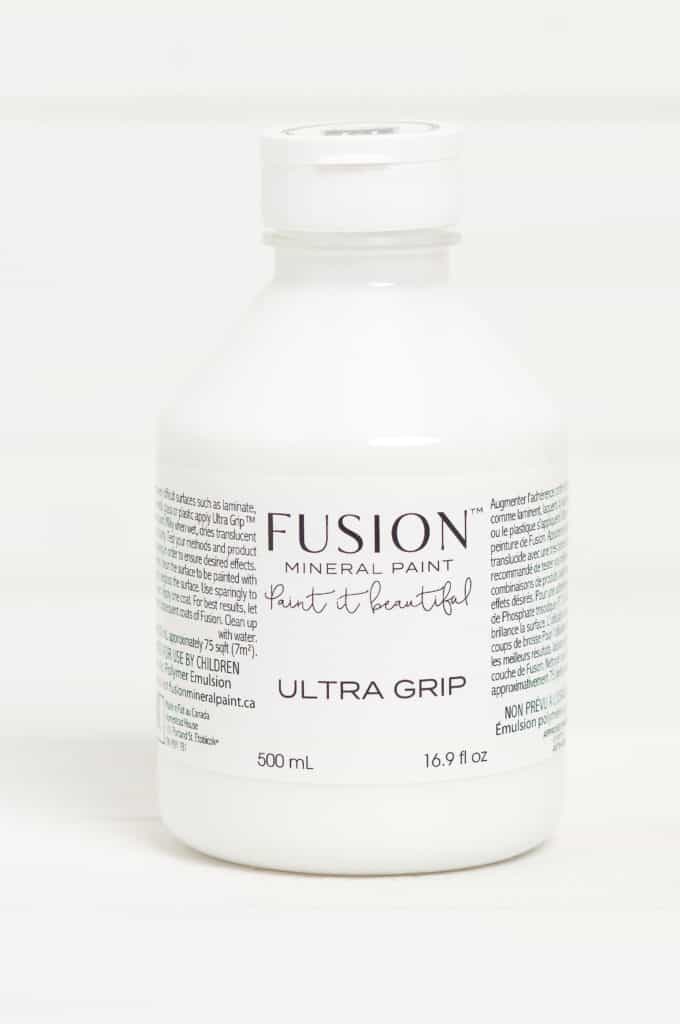
Instructions for using Ultra Grip are pretty simple:
- Apply one coat (best idea is a very thin coat using a micro-fibre roller).
- Allow to dry for 12 hours before applying subsequent coats of Fusion™ colours.
- Clean up with water.
Next – choosing a colour
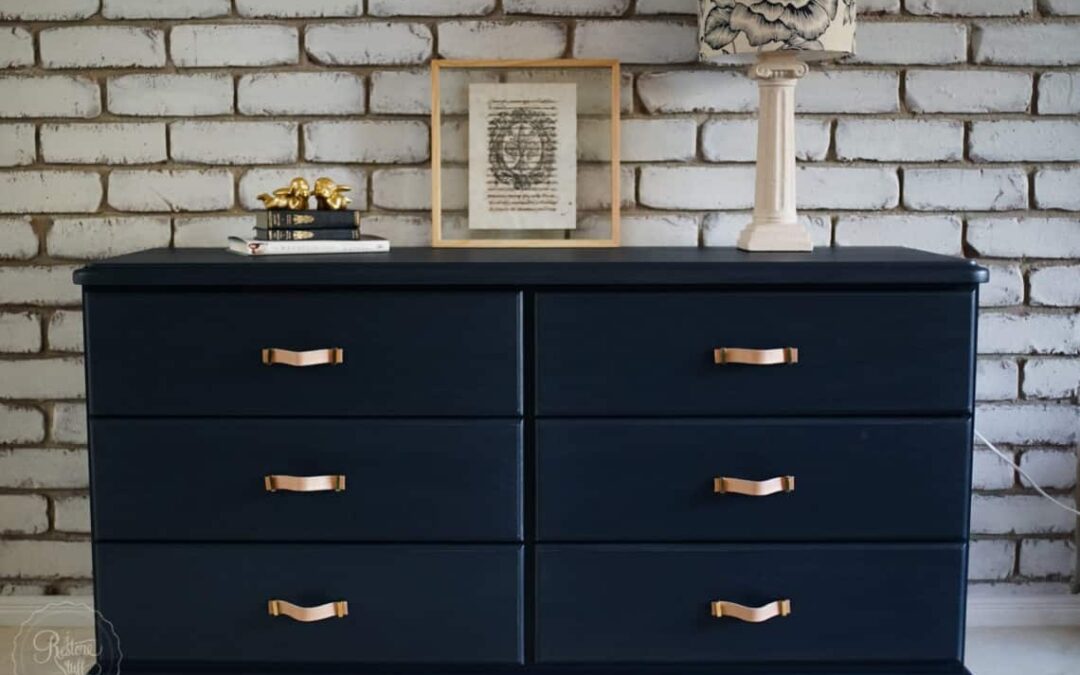
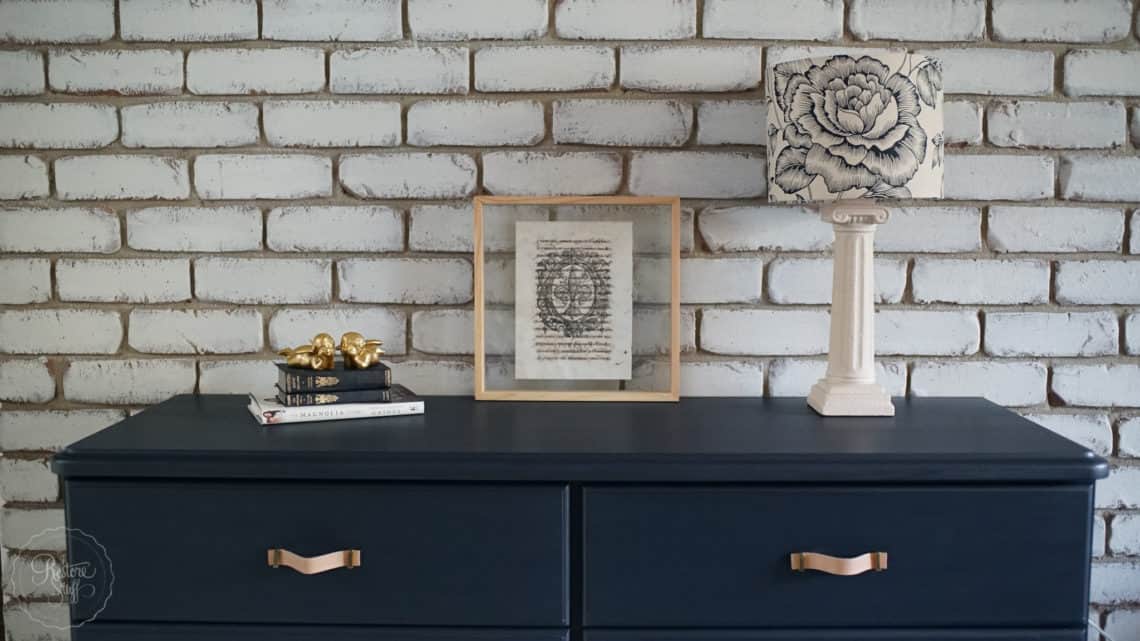
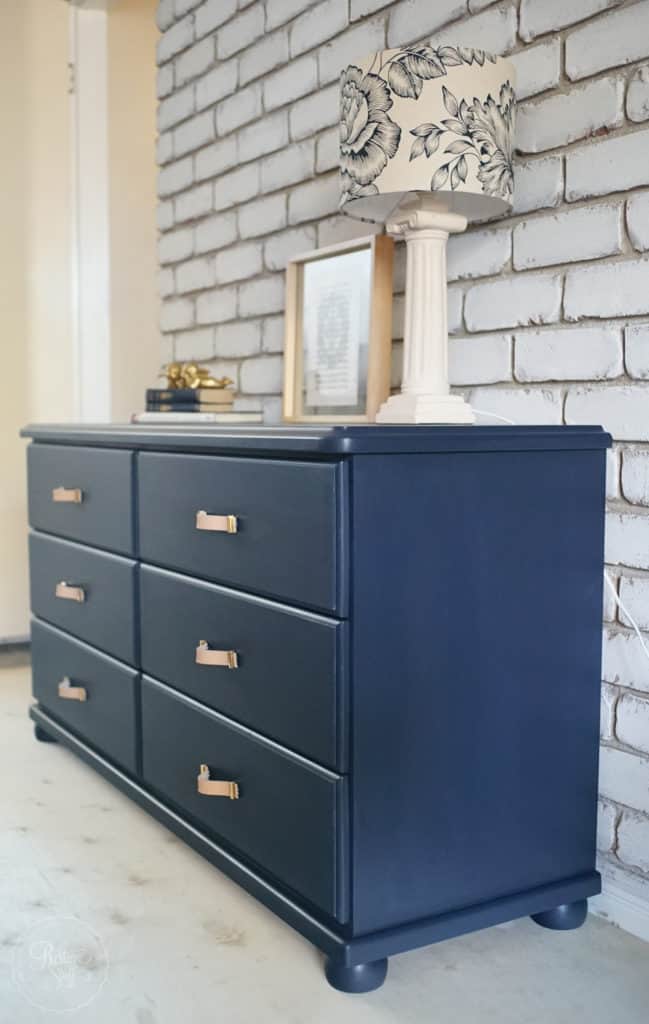
I am really loving Midnight Blue by Fusion Mineral Paint at the moment and it is turning out to be one of our most popular colours. It is a deep rich navy and has such an air of elegance. The colour covers so well and takes very little actual paint to complete a project.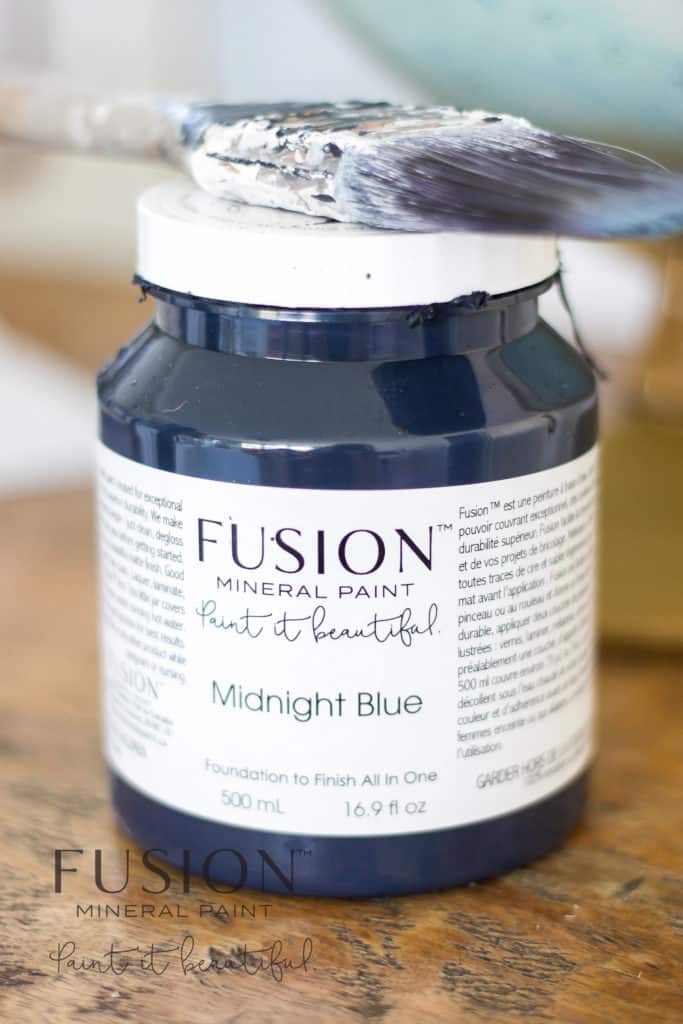
Now, I needn’t have been too worried about “bleed through” with such a dark colour, but I wasn’t fully decided on colour at the time, and some pro painters have said that sometimes you can still see bleed under dark colours.
I was happy with my plan to use the Ultra Grip, save time on extra sanding, and have the extra security that my top coat would be strong.
Exceptional Coverage
If you remember my example on my Instagram feed, of the great coverage that Midnight Blue has, when I painted a set of drawers for a client here: (click through below and you’ll see the brand new pot of paint; the set of drawers I painted in two coats of Midnight Blue; and the bottle AFTER I painted the dresser showing how little I used).
https://www.instagram.com/p/Bd61wvvlTCM/?taken-by=irestorestuff
So for this dresser drawer set I was painting – Midnight Blue did not disappoint. Here’s a little stop motion video I created for my Facebook page on the dresser all painted and the addition of it’s new handles!
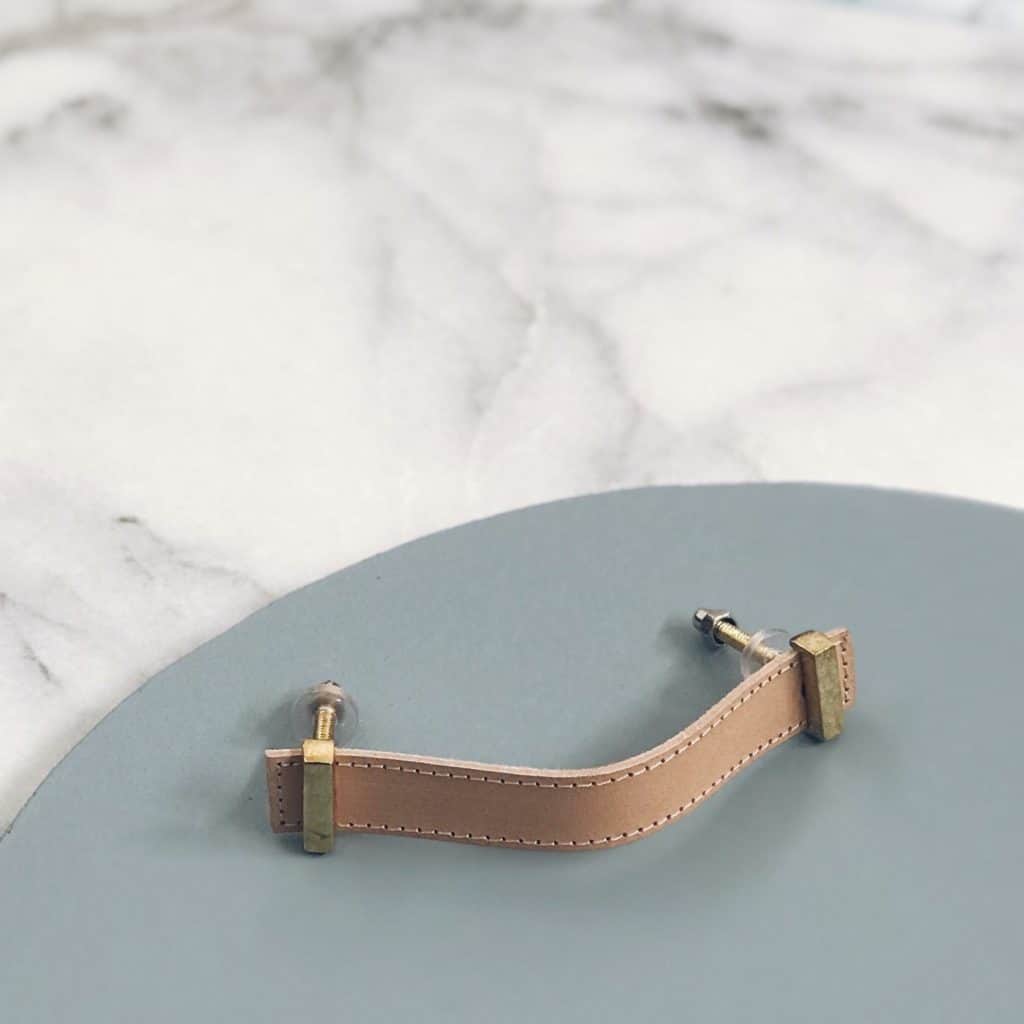
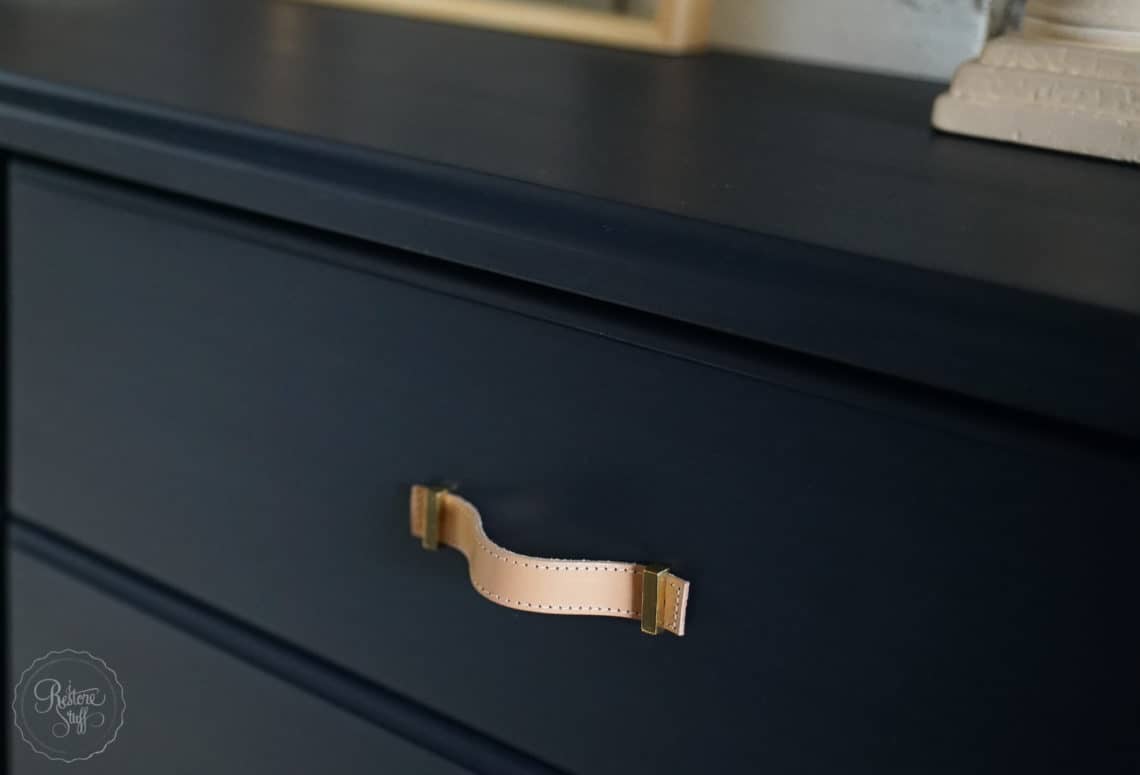
Those Leather Handles!
I was pretty excited to order these from Amazon Australia (affiliate link here: Leather Handles; USA/Canada can find similar here: Leather Handles)
Here is the final reveal of the dresser drawer set in all it’s new bling:
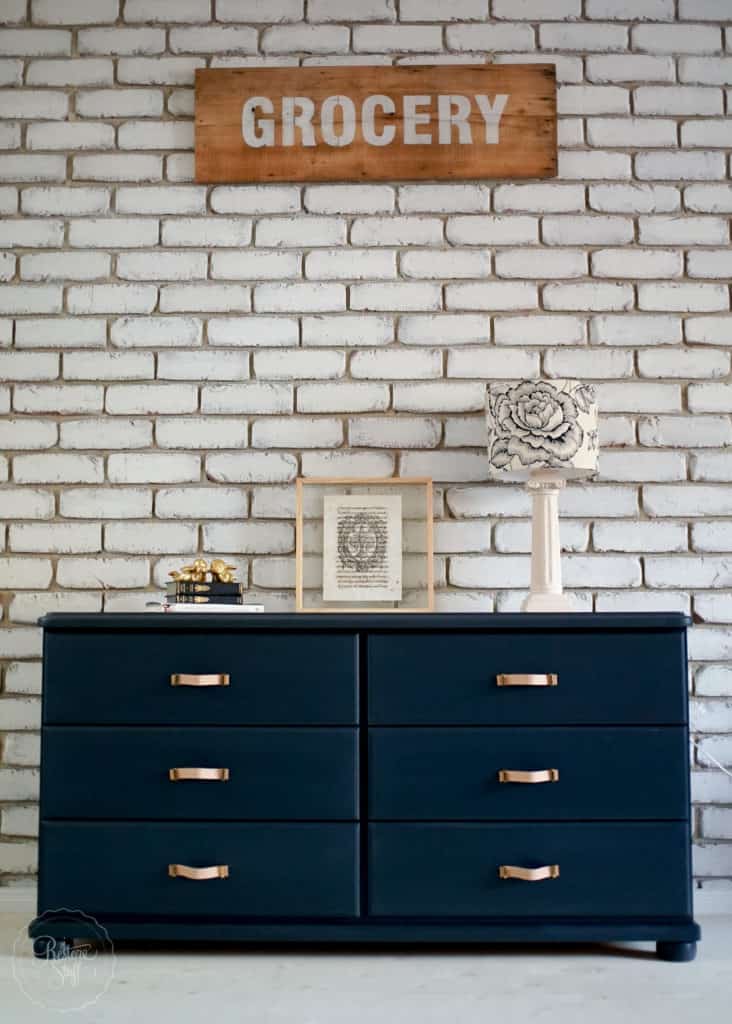
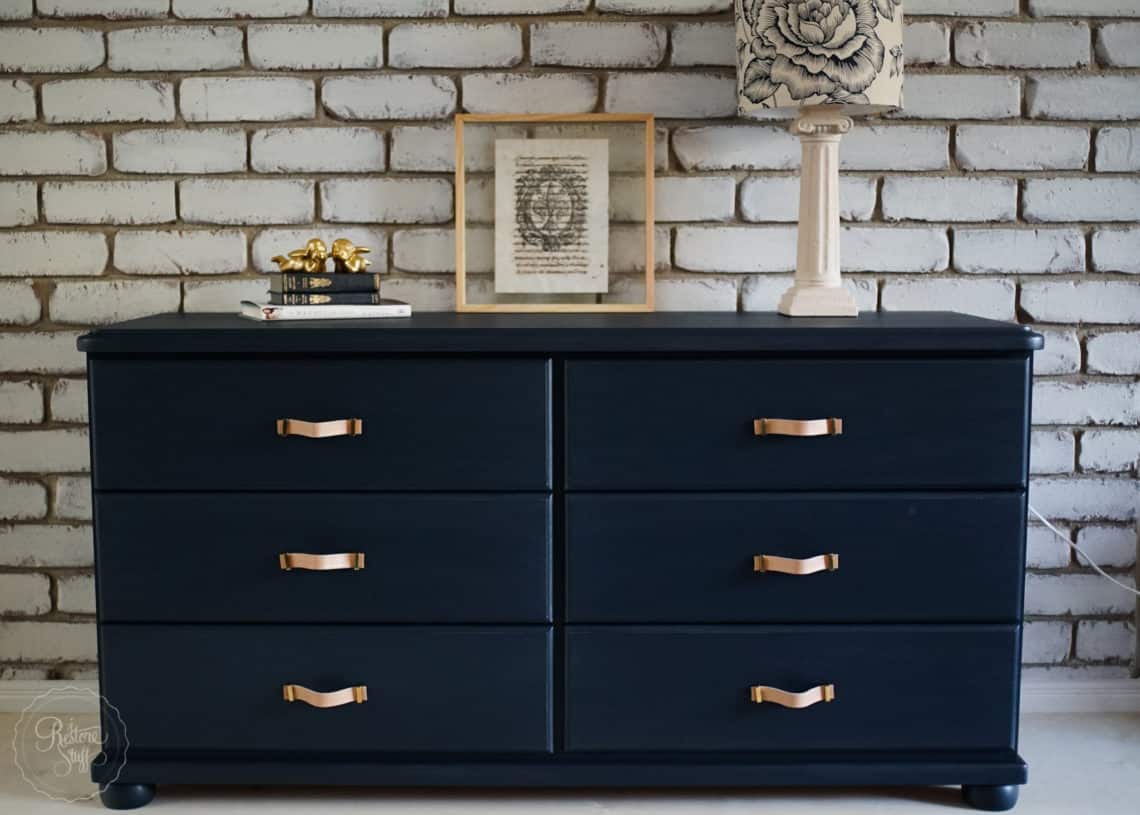
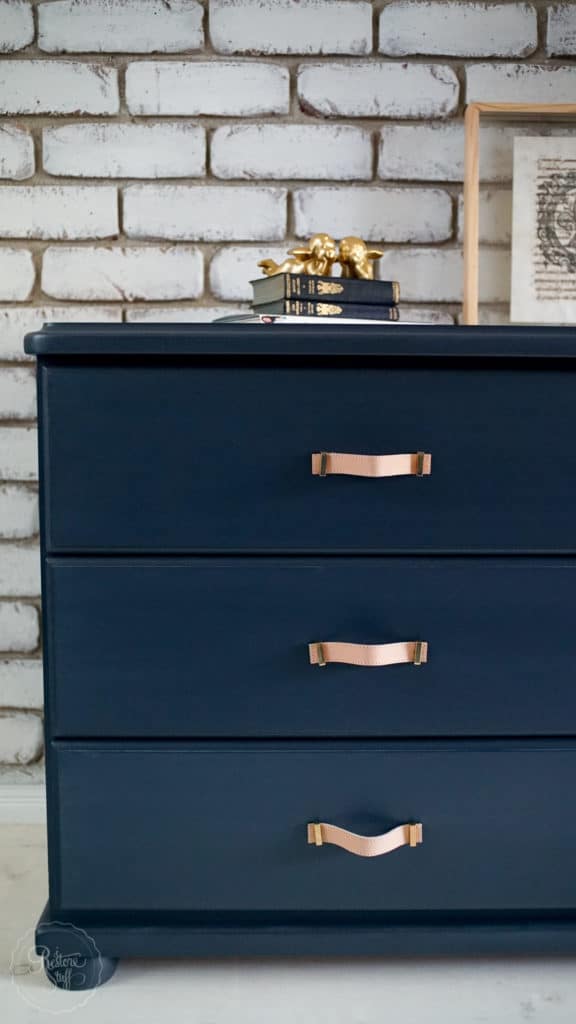
 I finished the dresser off with Miss Mustard Seed’s Furniture Wax to give the overall finish an extra sheen. Wax comes up so beautifully when buffed.
Here’s an image of this dresser drawer set makeover for you to Pin to your Furniture or DIY Pinterest boards:
The faux leather handles on this dresser drawer set, come in a few different colours of leather. You can click through to find more HERE.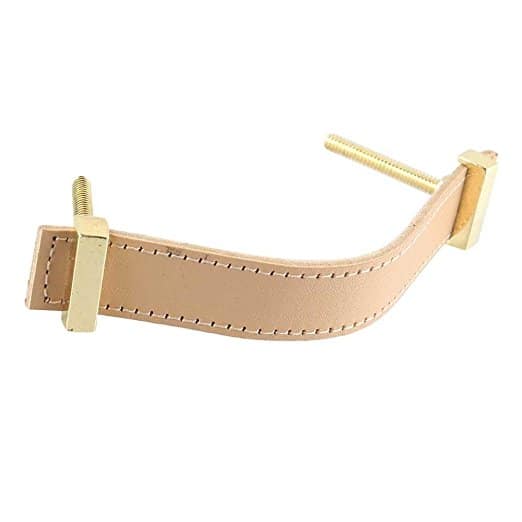 I’m linking this post up to Silver Pennies Sunday Link Party here:

First Time Painter?
If you’ve read through this post and would like to know more about using Fusion Mineral Paint, you may enjoy these tutorial posts:
Basics of Painting Furniture with Fusion Mineral Paint – Part 1
Basics of Painting Furniture with Fusion Mineral Paint – Part 2
The Difference between Chalk Paint, Milk Paint & Fusion Mineral Paint
Happy Painting everyone! Have a great week.
Sharon.