
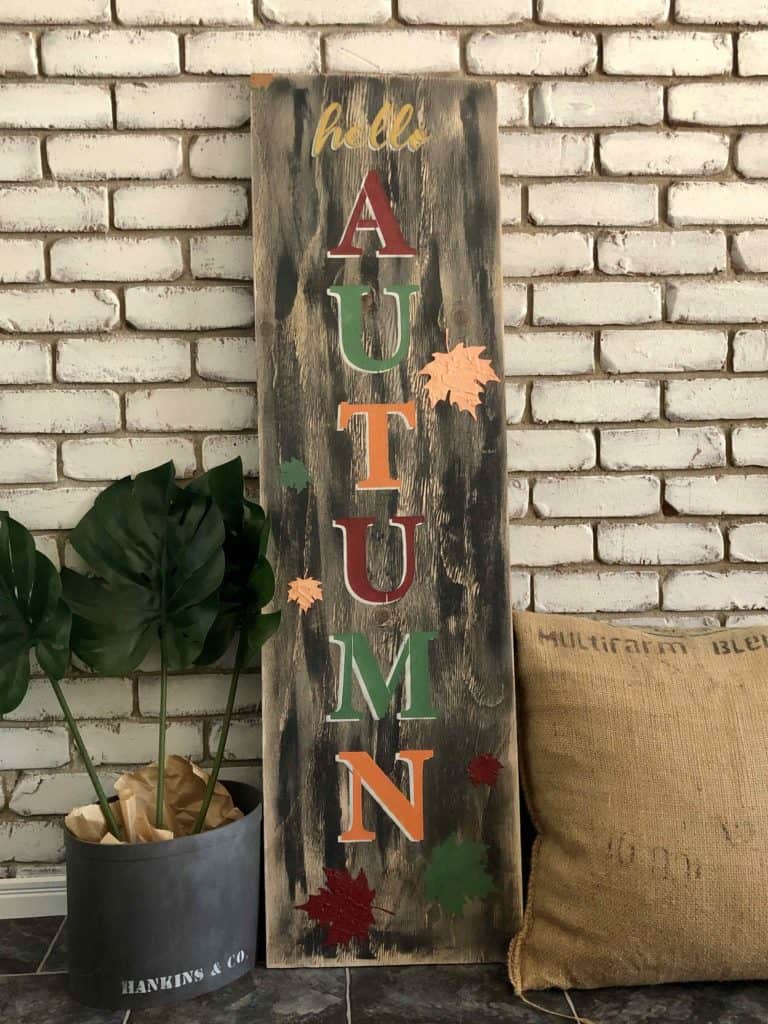
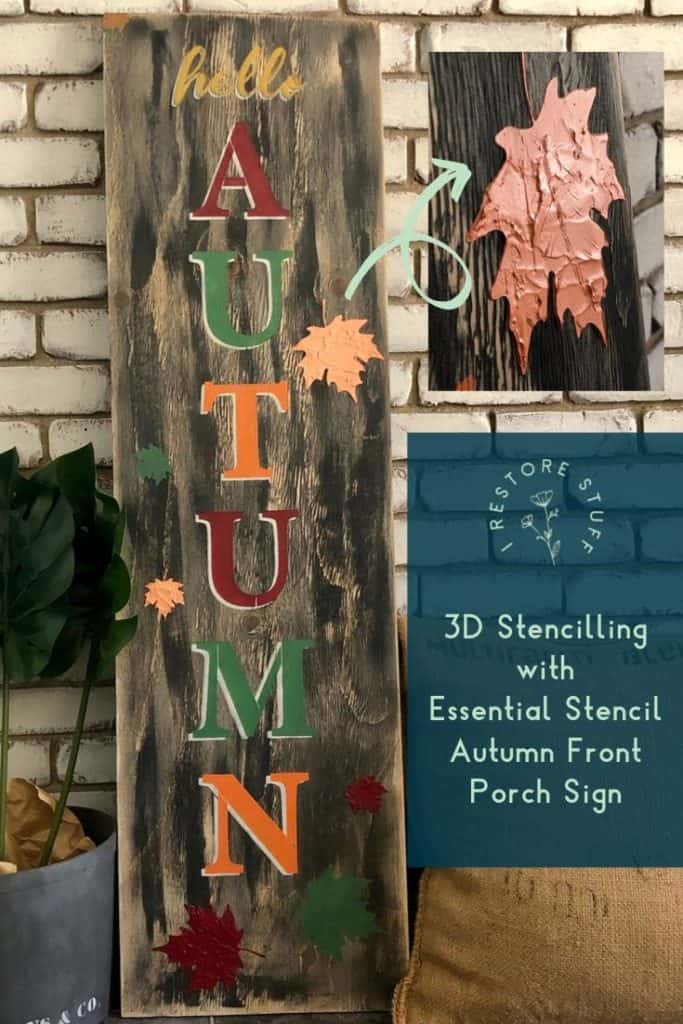
Create the perfect Autumn Welcome sign for your front porch …
… and before all my Aussie Down Under friends say “Wait, it’s SPRING, not AUTUMN” – there is so much more in this tutorial for you, so don’t go anywhere!
*This post contains affiliate links.
Raised 3D stencilling
In this Autumn Welcome Sign tutorial, in addition to my regular stencil technique, you’ll also learn how to:
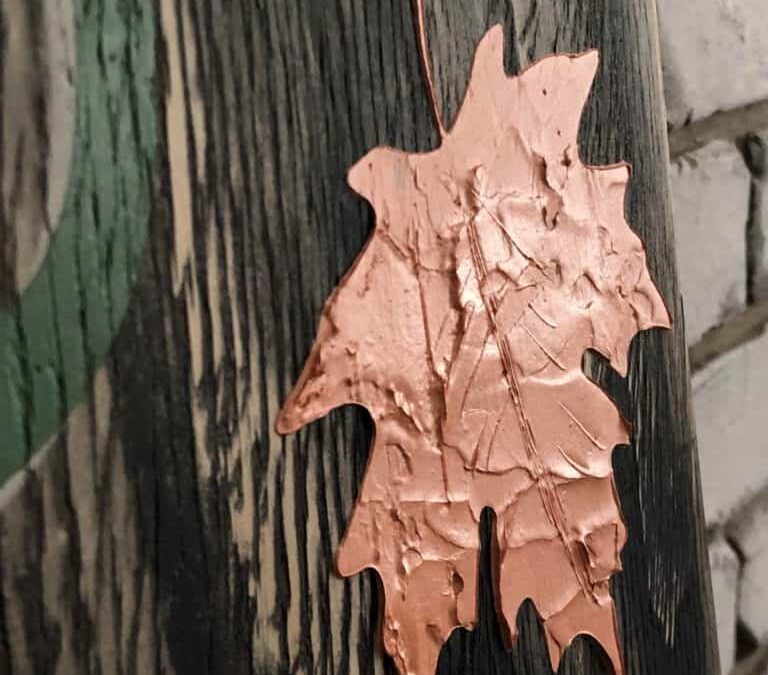
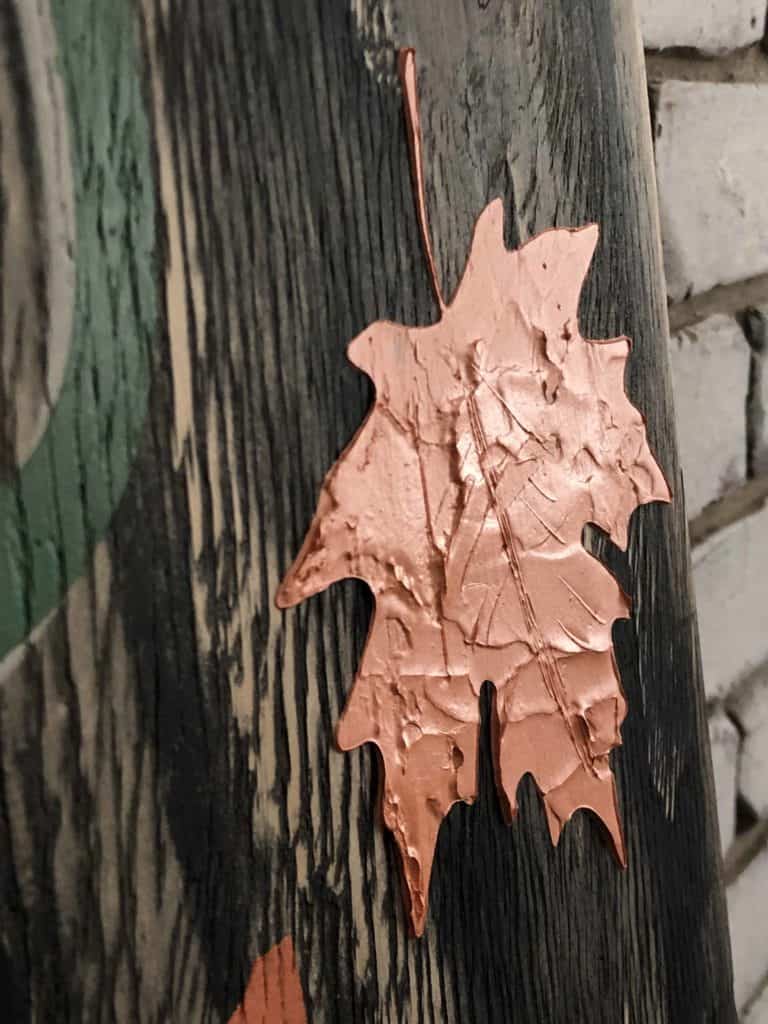
- stencil 3D raised or embossed designs using TWO different mediums
- create a shadow effect to make your stencil look 3 dimensional
As I show you these tips using Essential Stencil’s Hello Autumn stencil (currently no longer in stock), you can apply these same techniques with ANY of your favourite stencil projects, using Essential Stencils HERE (use code IRESTORESTUFF & save 10%)
Stencil Shadowing technique

Learn how to do this “shadow” technique
Autumn Porch Leaner Supply list:
To get started, I’ve prepared a supply list for you in case you choose to use any of the same products I’ve used in the video tutorial in this post. (I’ve included affiliate links for your convenience.)
- 5ft tall by 16″ wide Plywood (150cm x 40cm) prepared with stain or paint of choice.
- Essential Stencil 5′ Hello Autumn Stencil (this stencil no longer in stock, but you can view other porch leaner signs here)
- Fusion Mineral Paint Embossing Paste (Australian readers find it HERE)
- Fusion Mineral Paint Fresco Texture medium (Australian readers find it HERE)
- Painter’s Tape
- Artist Palette knife
- Fusion Mineral Paint colours: Tuscan Orange, Bayberry, Park Bench, Prairie Sunset, Cranberry
Autumn Welcome Sign Tutorial
Here’s the video tutorial I did during a Facebook live on Essential Stencil’s Facebook page. It is a replay, so if you need to skip ahead to the parts that you want to see, you can definitely do that.
Pin this tutorial to your Pinterest board using this image:
For 10% off your Essential Stencil order, enter my affil. code IRESTORESTUFF at checkout at Essential Stencil.