
Easy side table makeover for first time painters on a budget
This Cambridge side table makeover is a great example of an easy project you could do in one day, especially for those of you starting out in furniture painting. If you have never painted furniture or decor before, and you’d like to start with something simple, I’d suggest looking for something small like this side table or you could find a stool or small table without a drawer.
I know how it is when you want to change up a space in your home, but a new piece of furniture isn’t quite in your budget. Here’s where you can easily transform a piece of furniture AND add a pop of colour at the same time. And the bonus is you’ll save your hard earned cash.
Here’s how this side table started
I picked this small side table up from a local op shop (thrift store, for my USA friends). It did look like someone had started to sand it back on top and gave up, but I can’t be sure, because it also has that rustic look of some Balinese furniture that you’ll find sometimes when hunting for furniture to refinish.
I was thinking about sanding the top back further, but decided I’d mostly leave it as is, sanding it lightly, but thought I’d add a white wax to this and see it it gives more of a Hamptons feel.
If you zoom in to the basket drawer you’ll see it was quite dirty, dusty and in need of a wash, so I did just that. took it out and gave it a scrub in my laundry sink with a scrubbing brush.


To build or not to build
I thought about removing the basket all together and building a shelf inside the blank hole space instead, but decided against it for now, and to see if I could make the basket work.
I’m just going to call it what it is – laziness. LOL. I just wasn’t feeling like finding a piece of ply and pulling out all the tools to have it cut for this small project. But that is a great option if you ever find something like this.
But, back to making this project “simple”.
I started with a Cambridge tester size
I already had a Fusion tester of Cambridge opened to make a small swatch to show the new colours in my shop, so I used the rest of this tester and it actually covered the entire base of this side table to achieve one coat. I’m always impressed with how much coverage you get out of Fusion’s range.
Of course, I always give most of my pieces two coats – and for bright or white colours, I may need 3 or more, as with most paints. It depends on the pigments used, etc.


Choosing a brush to suit your project
It’s helpful to use a suitable brush for the piece you are painting on. For larger, flat surfaces, I generally choose a flat brush, like our Cling On F40 or S50, or I also love Artisan’s Flat 35 brush.
But for this smaller side table, it has these thinner legs and base, so I opted for a Cling On Round 12, which is the perfect width for these legs. Another favourite I use for these kinds of items, is the Cling On Short 30 (S30). The short handled brushes are perfect for things that have shelves, where you don’t want to have the brush handle bumping the top of the shelf while you’re painting the base. These “shortys” have a weighted end, to make up for the missing longer handles that create balance and reduce fatique while painting.
These also have a great “self cleaning” factor, which is one of the main things I love about them, and you can read more about that here.
Cambridge side table with One Coat
Here’s the side table after just one coat, which really only took less than half an hour to paint. In this pic, you can just see if you look carefully, that I hadn’t painted the inside of that space where the basket drawer fits, but I did go over this area when I opened a new pot of Cambridge. I opened a full 500ml pot of Fusion’s Cambridge to do the second coat, and to have more for my workshop for future projects.
I am loving the colour. In this image you can see that it is still drying, with the wet patches appearing darker in sections. You can also see a slight transparency in areas, so it will definitely need a second coat, as you want it to have a full solid colour.


White Waxing the Top
Moving on to the top of the side table after both my coats of Fusion’s Cambridge were applied, I chose to use Artisan’s White Wax to create a sort of white washed look to the top.
There are a number of ways to create a white washed look on furniture, and this is just one of them.
To apply white wax, you can use either a microfibre applicator or a wax brush (for more of an even application) along the grain of the wood. On raw wood, the wax sits in the grains and catches there to create a white washed texture. If you have existing finish or sealer on your piece, the wax will sit on top of the finish or sealer. This piece happens to have a mixture of both raw wood sections and some sealed areas where the surface is less porous.
White wax during application
In this picture you can see I’ve applied the white wax quite heavily over the entire piece.
Once you have applied the wax, leave it sit for a few minutes and then come back and wipe along the grain again, to remove any excess that might be sitting on the surface. It should leave a streaky, grainy white washed finish on you piece.
If you want to remove more white wax, you can apply a heavier pressure, or you can also use a clear wax on a cloth to gently rub away any areas that you’d like to be showing less of the white wax.
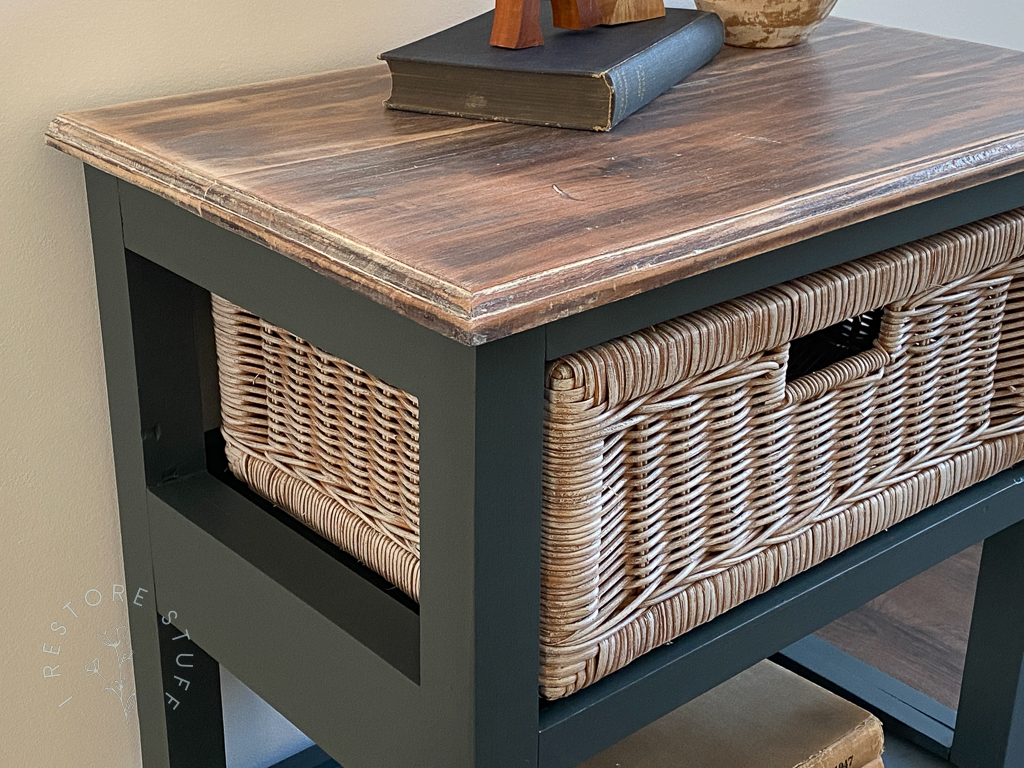
I’ll show you in the finished pictures how I removed a lot of the white wax to reveal just a subtle wash look. You can really play with the look to make it suit your own personal preference and how white washed you’d like it to look.
After removing the excess wax, allow a few more minutes to dry – it will still be “tacky”. Then buff the surface using a microfibre applicator or cloth, to create a nice smooth sheen. The surface should not be tacky after buffing.


Creating a White Wash look on Cane
Another way of creating a white washed look, on many surfaces, including this cane drawer basket, is by using a white or off-white paint.
I used Fusion’s Cashmere, dipped the tips of my paint brush into the Cashmere colour, then offloaded most of the paint onto the sides of the paint pot. I then offloaded even more paint onto a piece of cardboard. It’s easier to add more paint if you don’t have enough when using this method, but if you apply too much, you can’t take it off as easily.
Once you’ve offloaded most of the paint from your brush, brush it back and forth along the cane. The brush hits all the high points of the cane, creating a fun white washed finish. I love the difference it made to this tired looking cane basket, giving it a new lease of life.
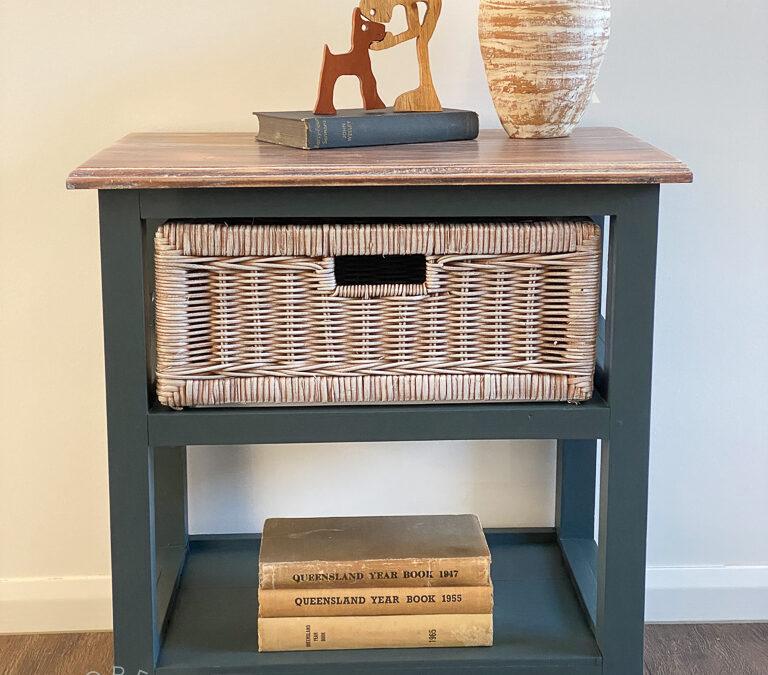
Cambridge side table Before & After


If you have any questions about this short tutorial, let me know in comments below. Is there something else you are wanting to paint? Use the search bar here on my website and type in search terms that you’re looking for, such as “table” or “dresser” and it will bring up all the blog posts where I have painted or refinished these items before in so many different ways.
You’ll also find lots of great tutorials and info via my Youtube channel (@irestorestuff on Youtube and all social media platforms).
If you’re local to me, I will post relevant workshops in my “Learn to Paint” tab here on the website menu.
You’ll find links to most of the products I’ve used today, among this post. I stock Fusion and Artisan products here in Australia, but if you are in North America, you can find Fusion Mineral Paint at my affil link here.