I love refinishing silky oak pieces.
This silky oak sideboard belonged to someone who had plans to refinish it herself, but along with a few other items, she decided to move it along to someone who might like to do it up.
That’s me! It needed a few repairs, and the top drawer was missing a good chunk from the top edge, but I created a solution using builders bog (bondo). I realised I really didn’t take a lot of process pictures on this one, but you can always use the search bar here on my blog, to find particular process tips on other makeovers I’ve written up.
How this piece started
This silky oak sideboard cabinet even had a narrow art deco style mirror back on the top, which I removed as soon as I got it home, knowing that it would be a more popular piece refinished without the original mirror. If this was a valuable antique, I would have left it, but this one was a little rough around the edges, so I had no problem removing it.
I gave it a clean with Artisan Easy Scrub – just a scoop in a litre of water, swish it around and you have a de-greasing cleaning solution that wont leave a residue on your surface, all ready to paint.


Refreshing the hardware
I used Rub n Buff to give the hardware a refresh. The handles weren’t original as I could see multiple holes where original handles had been attached.
Rub n Buff is such a quick and easy application, and you could actually just use your fingers to rub it on with, but I used a small brush and just rubbed it all over the cleaned hardware. I used the colour Antique Gold (available in Australia in my online shop or in the USA here). It dries very quickly and gives it an authentic metallic look.
Drawer Repair and Painting
I wanted to finish this piece with a combination of wood and paint, as I wanted to showcase the lovely silky oak, but the top drawer was missing a section across the top, and cracked across the entire top of the drawer. So I used Auto Body Filler (USA) or Builder’s Bog (Aus), to mould that top section and it worked well for creating a fairly neat finish.
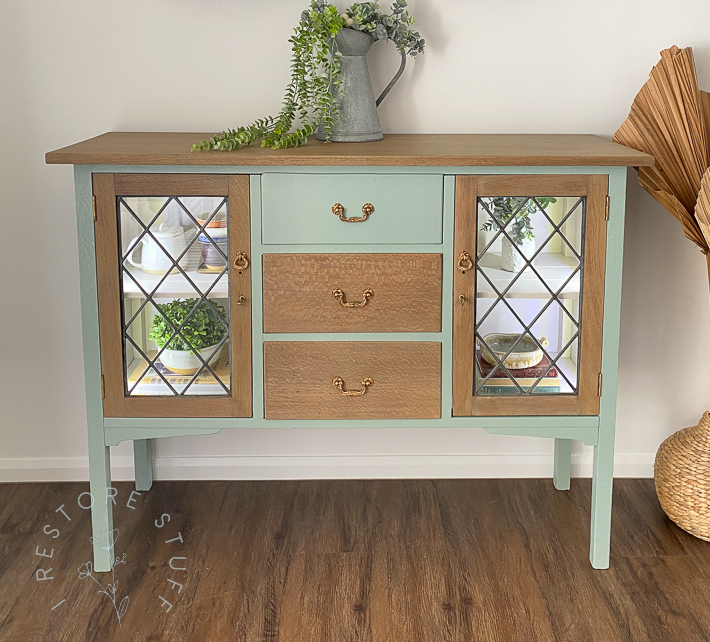
To paint this silky oak sideboard, I used Artisan’s Eucalypt for the main body and the top drawer, and Canvas, a creamy off white, for the inside.


But this top drawer would definitely need painting, as the bondo addition was not a good look if I had sealed or stained this top drawer. I painted the top drawer and stained/sealed the remaining two. I could always paint the remaining two to match if I didn’t like it, but I’m happy with the way this is looking.
Creating a Wash and Sealing the Wood Areas
For the top and the drawers, here is how I achieved this lovely light oak tone on the silky oak wood:
- I created a wash out of Artisan’s Eucalypt colour that I painted the base of this piece with. Yes, a GREEN wash. The pale green of the Eucalypt colour, counteracted the orange tones in the silky oak wood and gave it a lighter finish. To create a wash, I used approx 80% water, 20% paint, mixed it up, brushed it on and wiped away the excess.
- To get the warmer tone on top, I then sealed the wash with Artisan Stain and Seal in the colour Walnut. I used a Super Sponge to apply it with even strokes across the surface along the grain.
I repeated this look on all the areas I wanted the wood to show – doors, drawers, and top.


I used the same wash, followed by Walnut Stain & Seal for the cupboard door frames also.
They were all in good shape, but just needed a good cleaning with first, a damp cloth that had been dipped in hot soapy water, then a Windex wipe – or if you have a window or glass spray, that works well too.
(This blog post may contain affiliate links)
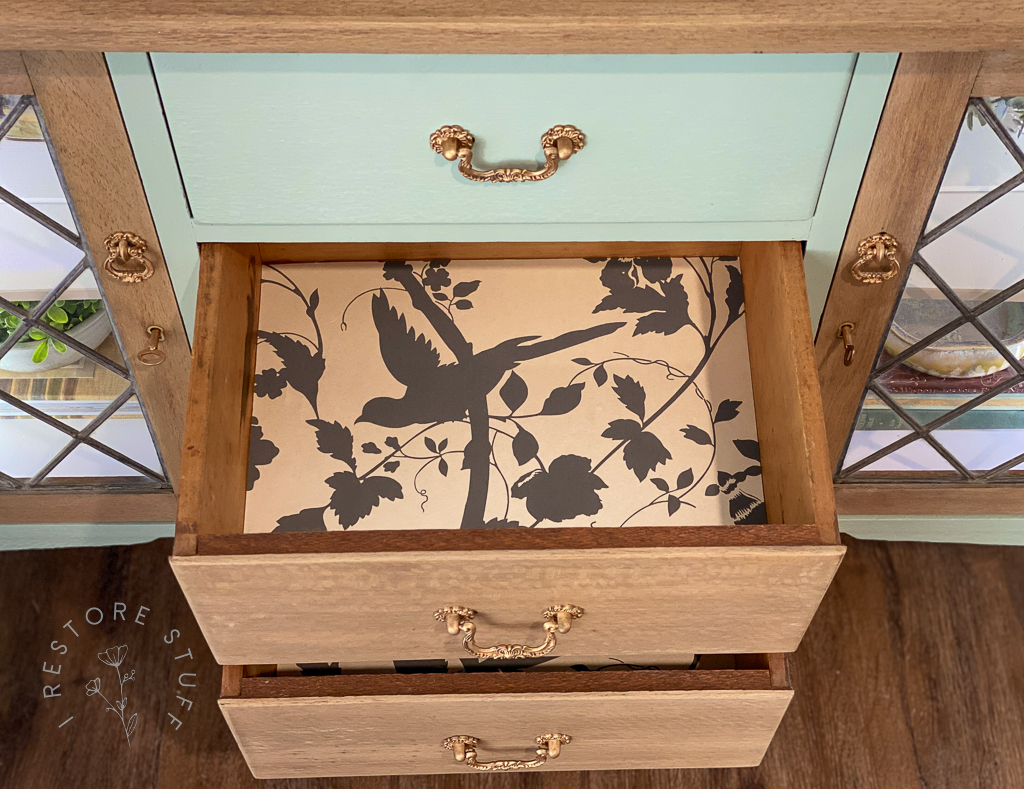
The insides of the drawers had some ink stains in a couple of them, which are really nearly impossible to get out of wood grain. So if that is the case, I usually either paint the insides or line with wallpaper.
You might recognise this Laura Ashley wallpaper from other pieces I’ve refinished recently. It’s a lovely neutral grey/green pattern that goes with almost anything, and gives a lovely pop of fun to the insides.
It also creates a nice clean surface to store items for the new owner of this piece.


Bonus Styling Tip
Now for a bit of styling inside the cupboards so I can take some photos ready for selling.
But I have a great tip for you if you too, are refinishing pieces to sell.
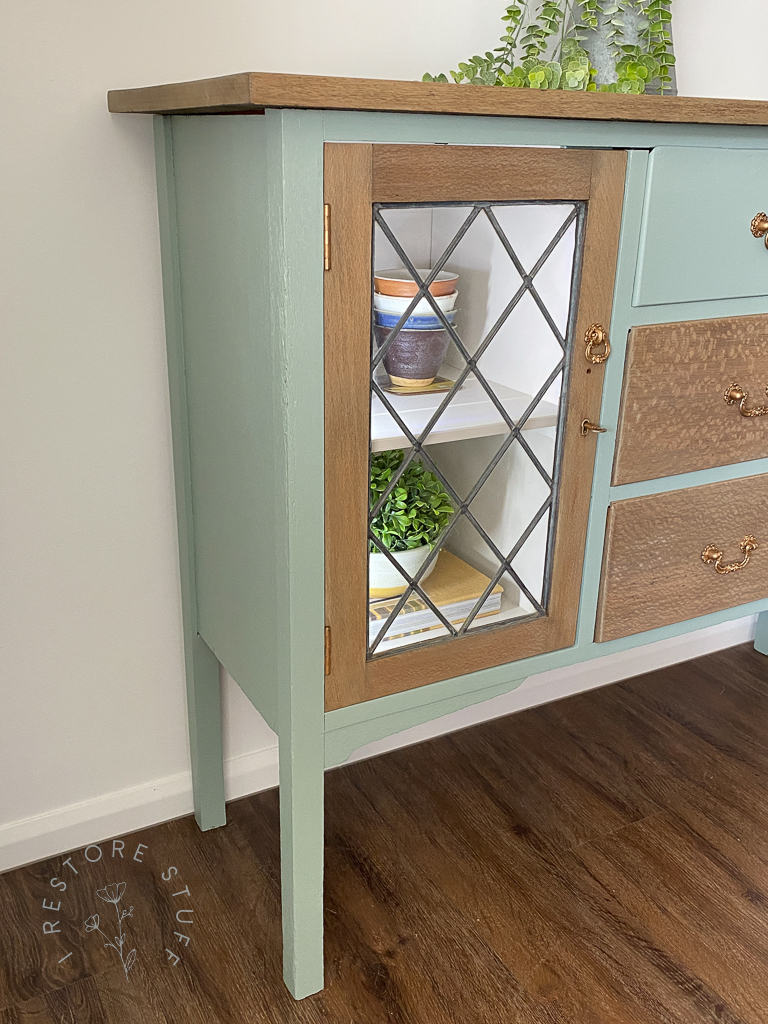
See how dark it is inside the cupboard when the door is closed?
I bought a few LED battery operated lights to sit inside the cupboard …


Here is what mine look like, and I simply sat them just inside the hinged side of the doors on each shelf, facing toward the back opposite corner of the shelf.
These ones also have a magnet on the back that can be attached under a shelf if you wanted to use them that way.
I did think of using blue tac to make them sit under the shelf, but they would have been visible in pictures.
Now I’ll have them ready for future staging opportunities or even for my own use in our home.
Silky Oak Sideboard all Finished using Artisan products
Here’s the finished look and here’s a recap of supplies used:
- Artisan Easy Scrub (as part of your prep to clean & degrease)
- Artisan Prep sanding pads – to scuff sand your piece before painting
- Artisan Quick Prep Primer (use either grey or white under the white cupboard interiors to transition from dark wood to light paint)
- Artisan Mineral Paint – Eucalypt (green outside) & Canvas (inside cupboards)
- Artisan Mineral Paint wash – 80% water : 20% Eucalypt paint (for wood areas)
- Artisan Stain & Seal in Walnut – to seal and add final layer of warmth to the wood areas.

Styling tip for photographing your pieces – use LED lights inside your glass door cabinets.


Earn ‘Paint Points’ here at I Restore Stuff
Earn your I Restore Stuff “Paint Points” on your next order when you log in to make your next paint or DIY product purchase!
Exchange points for dollars off future purchases, earn points for referrals and more.