
Have you created a glaze finish over chalk paint?
In looking at how to create a glazed finish over chalk type paint, I’ve found this method I show here, the best, in my opinion.
It can be different adding glaze to a chalk paint (porous finish) than it is to a mineral paint (non-porous finish) that usually has a built in top coat.
For a detailed post on the difference between chalk paint, mineral paint and milk paint – head HERE.
In this post I’ll go through the basic steps I used to prep, paint, stencil and seal. Then I’ll explain the glaze process with the help of a tutorial video I recorded.
Prep your piece
I have done similar pieces to this one, with what I call, a Malaysian or Balinese style finish. The surface is fairly slick, so I usually give these a good scuff sand with a 180 grit or similar.
Give it a good clean with some Artisan Easy Scrub. (If you’re in the USA/Canada, find a great cleaner here – affil.)
In this image you can see I’ve removed the door via the hinge. I usually remove my doors and drawers when painting, to give neater edges.


Fill in the gaps
I don’t usually fill in every nook and cranny in these roughly hewn timber pieces, but this one had a crack right across the top where the top was joined using two pieces of wood.
So I filled it with wood putty since I was going to paint the entire piece anyway. Allow to dry then sand back.
I used this one, by Timbermate, but you can find similar at your local hardware store. (USA affil link HERE)
Paint your piece
I used Artisan’s Natural Chalk Finish for this piece. You can apply this tutorial to any other chalk paint you use.
Artisan Paint is an Australian company that produces both chalk type paint and mineral paint, along with a range of decorative finishes and sealers.
For this project, I used the colour, Truffle, a light taupe and a great basic neutral shade. I pour a little into a dish from the large 1L bottle. I have a misting bottle on hand which I use occasionally if the weather is very hot like it is here in our Australian summer. I spray a little either on the brush or in the area I’m working on. Our misting bottles release the finest mist, not a spray, in order to not create drips or streaking, but to dampen the surface for perfect even strokes.
I’m also using our Artisan Italian brush in Oval 12.


After one coat of chalk paint, allow to dry a couple hours at least before adding your 2nd coat and so on.
This piece covered very well in just 2 coats.
I removed the drawer and the cupboard door to paint those separately as I find that easier to get a neater finish.

add a Stencil to your piece
Using one of Essential Stencil’s stencils, I’m taking furniture restoration to the next level by creating a stunning faux rattan pattern on the sides, drawer, and cupboard door of this piece.
Side note: If you’re in the USA, you can save 10% on any of Essential Stencil’s quality stencil products or rub on transfers by using my special code IRESTORESTUFF right HERE.
And if you’re looking for some guidance and inspiration, I have plenty of how-to stencil tutorials available on my YouTube channel. Let’s build your confidence together and create beautiful, unique furniture pieces.


For the Rattan stencil, I chose a complimentary colour with Artisan’s Natural Chalk finish, in Creme Brulee.
If you follow any of my stenciling tutorials, you’ll see that sometimes I create a nice solid coverage, and other times I create a soft, rustic look, which is what I was going for with this piece.
I want it to look aged and worn, so when I stenciled I used my swirling method with a very dry brush, and used a heavier hand in some areas, and a lighter pressure in other areas.
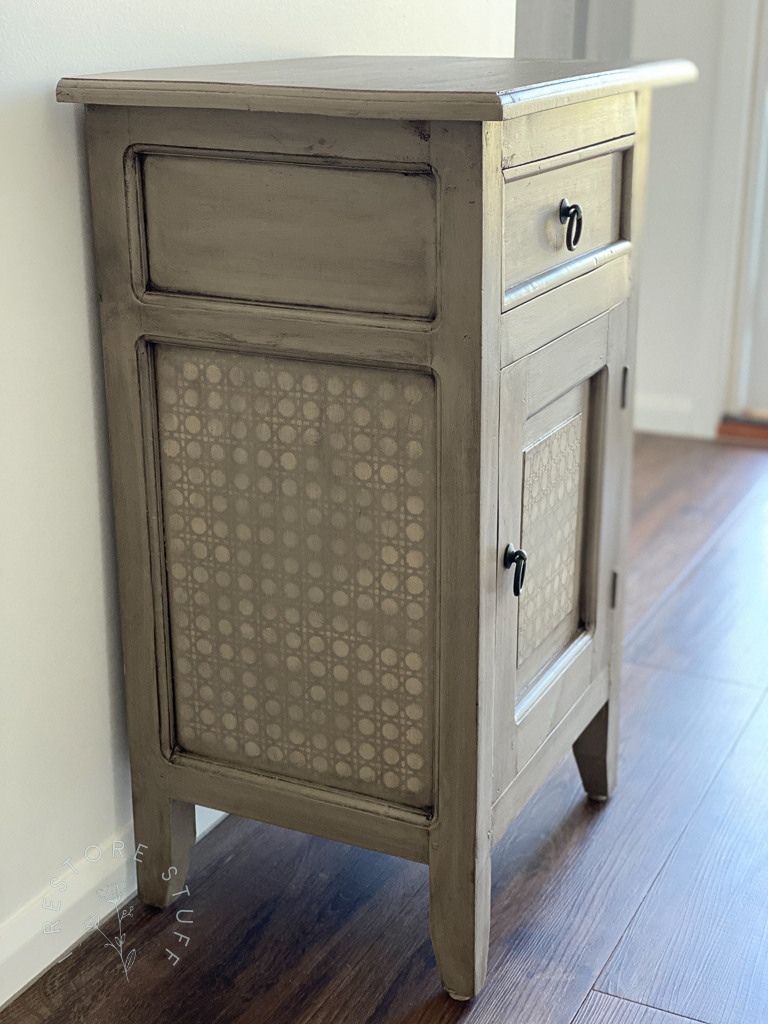
Here’s the finished stencil, showing some areas heavier than others, as described above.


Adding a glaze
I have a popular tutorial on glazing using mineral paints, but when using glaze on chalk type paints, I like to seal the porous finish first.
I used Artisan Flat Matte Sealer to seal it all over. This makes it easier for the glaze to spread across the surface. If using the glaze straight on the unsealed chalk paint, the glaze colour tends to sit in the porous surface creating a patchy look.
I used Artisan’s Charcoal Black Glaze for this, but it also comes in Antique Glaze or Clear Glaze which you can colour with any water-based paint.
The video below will show the process I used for glazing:
Finished Results
Here is the finished look after the glaze.
NOTE: I did also seal the surface after a day of allowing the glaze to dry, to give it extra protection, using Artisan Poly Varnish a strong protective sealant.


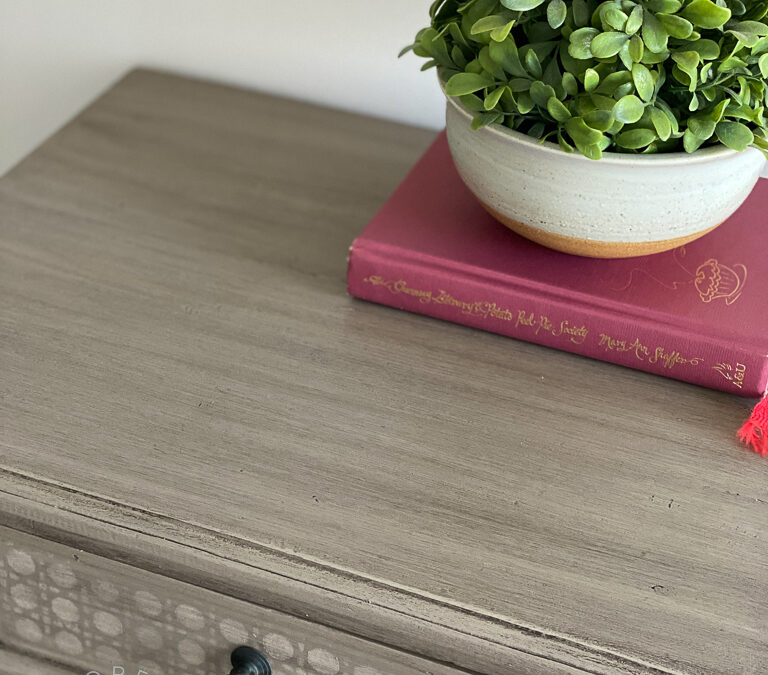
Here’s how the top surface looks after glazing and sealing.
See how you can create a driftwood type look using the glaze, when wiping across the surface in smooth even strokes.
This effect works well for a number of different colours, just choose a colour that will contrast well with the glaze you opt for.
Artisan also produces in a CLEAR glaze, which is fantastic for creating your own custom colour glazes. Just mix a little paint with the glaze, and you have a custom glaze.
The ratio I use is usually approx 1 teaspoon of paint to 1 tablespoon of glaze. This makes enough to cover a good size bedside table as it does go a long way. Just remember your ratio, so that if you run out, you can make it again in the same strength.


Let me know if you have any questions regarding this project. Have you used glaze before?
Beautiful work. Looks classy and funky at the same time. Nice warm gray color choice as well. Appreciate the tips!
Thanks so much. Glad you appreciated the tips.